Arnold ass File Example
Get Prepared
If you haven't already done so, Download the Companion App.
In this tutorial, you'll render the motion-blur example scene provided by SolidAngle. You'll need to have Maya installed.
- Download and unzip: Motion_blur.zip
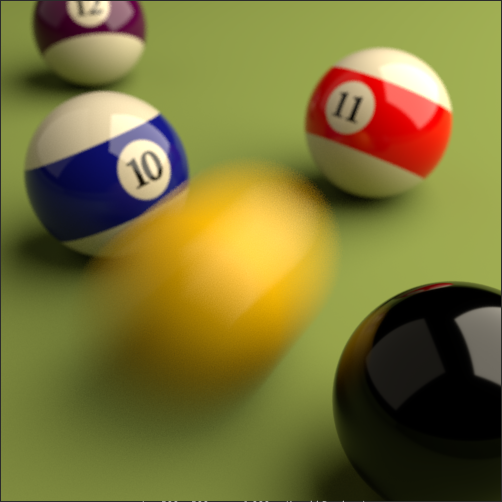
The scene Motion_blur.ma contains a short animation of pool balls.
Export ass Files
- Open the scene in Maya and render a test frame, so you know what to expect.
- Open Render Settings->Common tab and set Frame Padding to
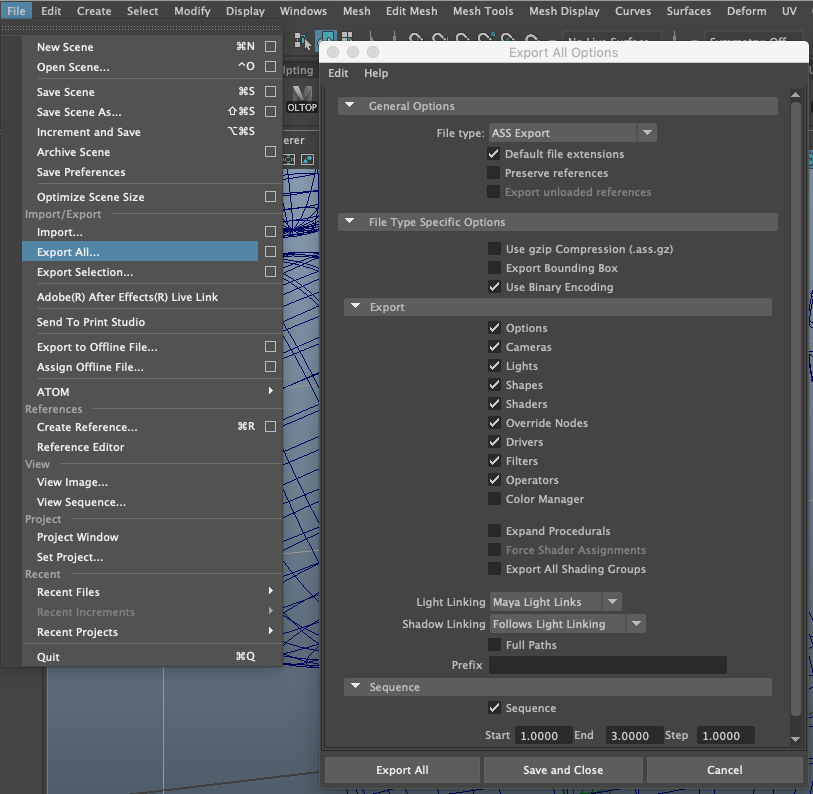
4. Change Frame/Animation ext if necessary. - Choose File->Export All [] and set the export options as illustrated. Turn off the option to export the color manager.
- Press Export All then choose a location and export the files.
Configure the Submission
Files
- Open the Companion app, sign in to your account, and go to the Submission Kit page.
- Go to the Files tab and use the folder button to browse the new ass files.
- Browse again to add the pool ball textures that came with the scene.
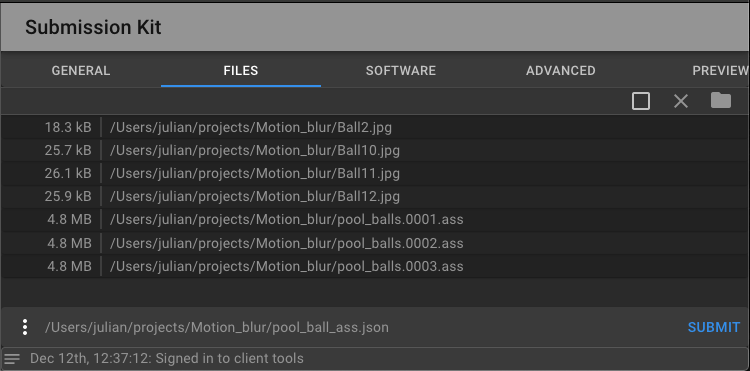
You can check the presence of files in the upload_paths field in the Preview tab.
General Tab
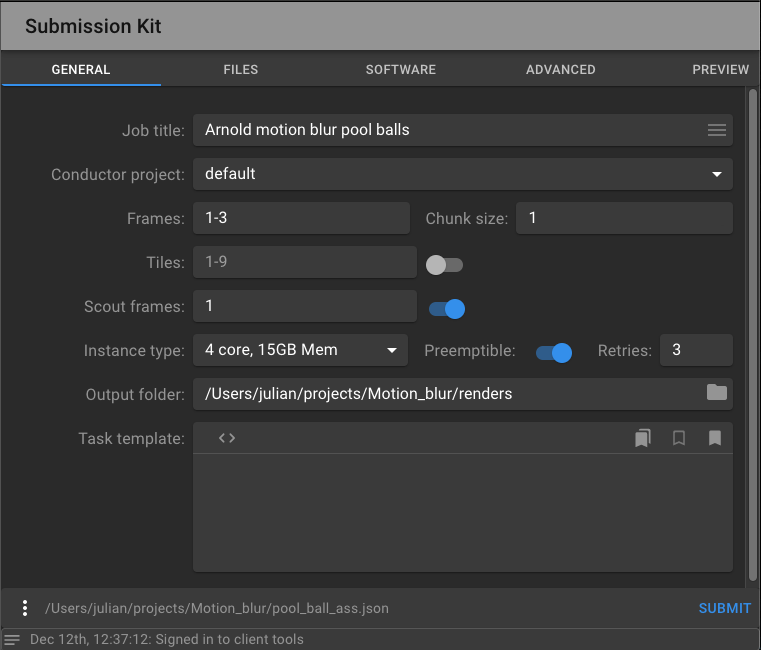
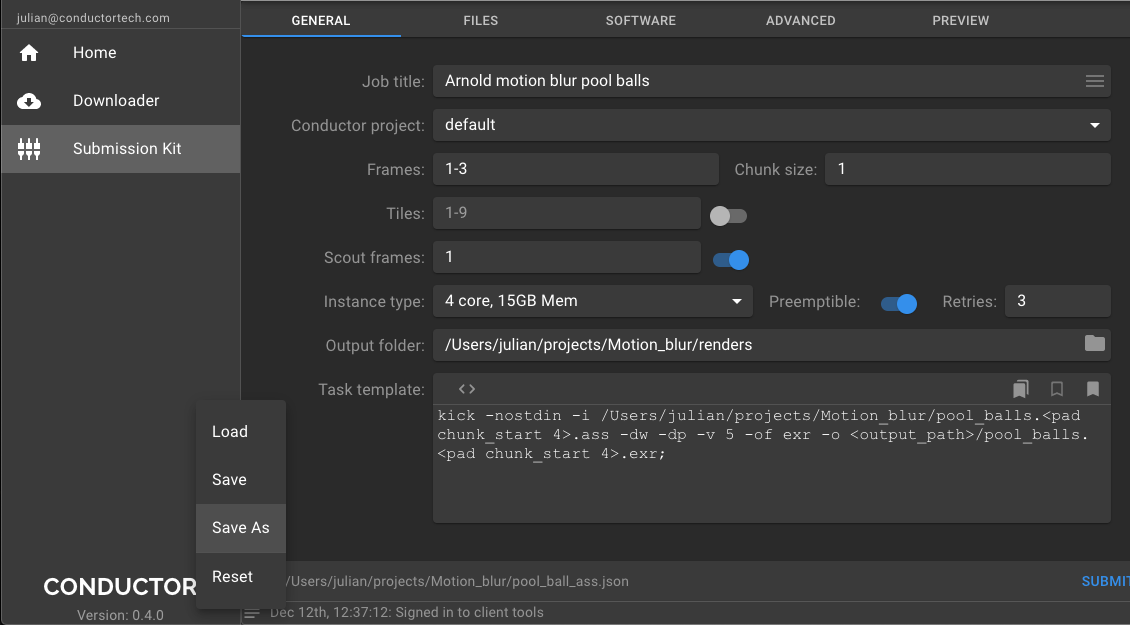
- Fill in the form fields in the General tab as illustrated below. You may have to choose a different instance type and a project that exists in your account.
- Browse for an output directory where you want your renders to be downloaded.
Warning
The output directory must not contain any of your input files.
Note
Due to a limitation in the file dialog, the button to choose an output directory is labeled "Upload."
Task Template
The Task Template is where you specify the CLI command to run on each render node in the cloud.
- Paste the following command there. Be sure to use your actual working directory for the path to
assfiles. kick -nostdin -i /Users/me/projects/Motion_blur/pool_balls.<pad chunk_start 4>.ass -dw -dp -v 5 -ds 4 -ss 4 -as 6 -of exr -o <output_path>/pool_balls.<pad chunk_start 4>.exr
kick is SolidAngle's command to render a single ass file. The command sets the following flags to override the render settings in the scene:
- -nostdin Ignore input from stdin
- -v Verbosity level
- -dw Disable render window
- -dp Disable progressive rendering
- -as Anti-aliasing samples
- -ds Diffuse samples
- -ss Specular samples
- -of Output format
- -o Output filename
Use kick --help in a command shell on your computer, or browse the Arnold documentation for a full list of options.
Notice the -o flag that specifies the out file location. You can use the <output_path> token here. It takes the value directly from the output folder field above.
Several other tokens are available. We use the <chunk_start> token in our template with a special modifier to pad the number to four digits <pad chunk_start 4> because the ass files contain padded frame numbers.
If you go to the Preview tab, you'll see the resolved ass filenames and output paths in the tasks_data section.
Take a moment to save the state of the submission.
- Choose Save As from the More Menu in the bottom left corner of the panel and save it in your working directory as
pool_ball_ass.json.
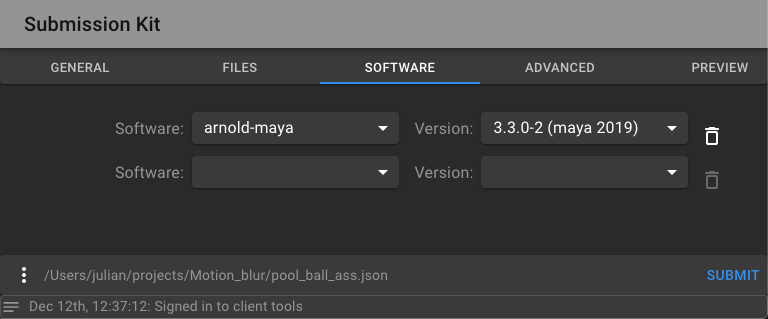
Software
To configure your job environment, you must select the set of software and plugins it requires.
- Go to the Software tab and choose a recent version of Arnold for Maya.
If you head back to the Preview tab, you'll see the environment section contains several paths required for rendering Maya with Arnold. However, there's one path missing. The ass files use Arnold versions of Maya shaders, and the path to these shaders is not made available to Kick by default.
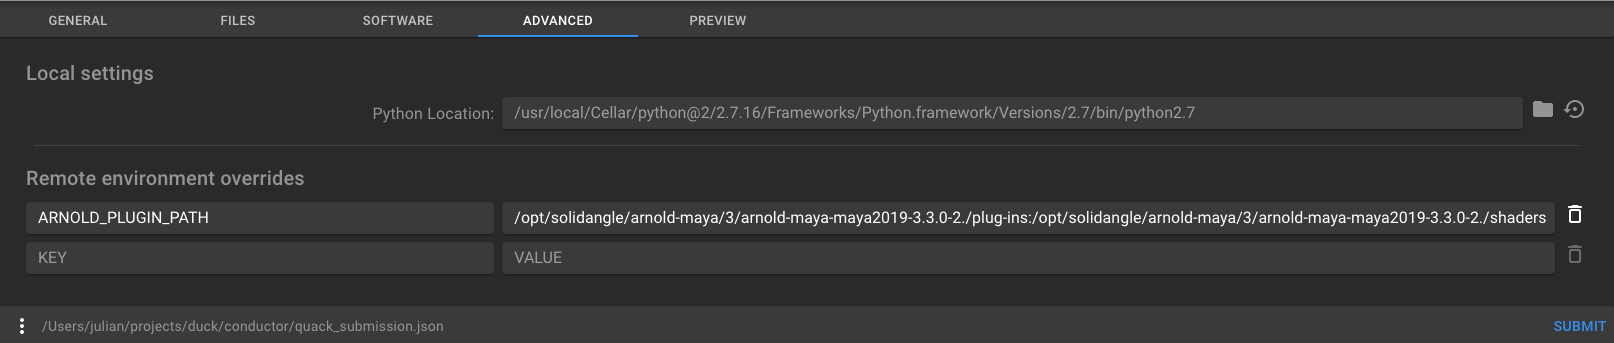
Fortunately, we can override the ARNOLD_PLUGIN_PATH variable in the Advanced tab.
Advanced Tab
The exact path to be appended depends on the Arnold software version you chose. It is the shaders directory, which is a sibling to the plugins directory.
For example, if you chose Arnold Maya 2019-3.3.0-2 software, then the default value for ARNOLD_PLUGIN_PATH, which you can check in the Preview tab, will be:
/opt/solidangle/arnold-maya/3/arnold-maya-maya2019-3.3.0-2./plug-ins
You need to append the shaders path:
/opt/solidangle/arnold-maya/3/arnold-maya-maya2019-3.3.0-2./shaders
So the full path to enter as an environment override is:
/opt/solidangle/arnold-maya/3/arnold-maya-maya2019-3.3.0-2./plug-ins:/opt/solidangle/arnold-maya/3/arnold-maya-maya2019-3.3.0-2./shaders
Note
The above technique is also how you'd make available proprietary or 3rd party shader libraries, along with adding them to the list of assets to be uploaded.
Python Location
The submission is processed using Conductor's client-side Python API, and therefore Python 2.7 must be available. You can check this in the Settings page.
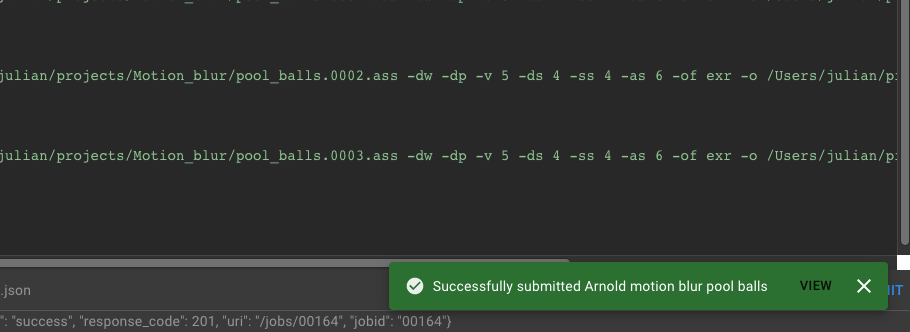
Submit
You can now press Submit. You should see some activity in the status bar. If you click the small icon in the status bar, you'll see the complete log where you can identify submission errors, if any. If the submission is successful, a popup appears with a link to the jobs page.
Appendix
- If you choose to export the color manager, you'll need to upload the synColor files from your Maya installation.