Houdini PDG Conductor Scheduler
In this guide, you'll learn how to submit Houdini PDG graphs to Conductor efficiently.
This tutorial should get you going quickly. Please check the Houdini PDG Conductor Scheduler reference page and the Conductor Companion App for a detailed description.
Install the Conductor Plugin
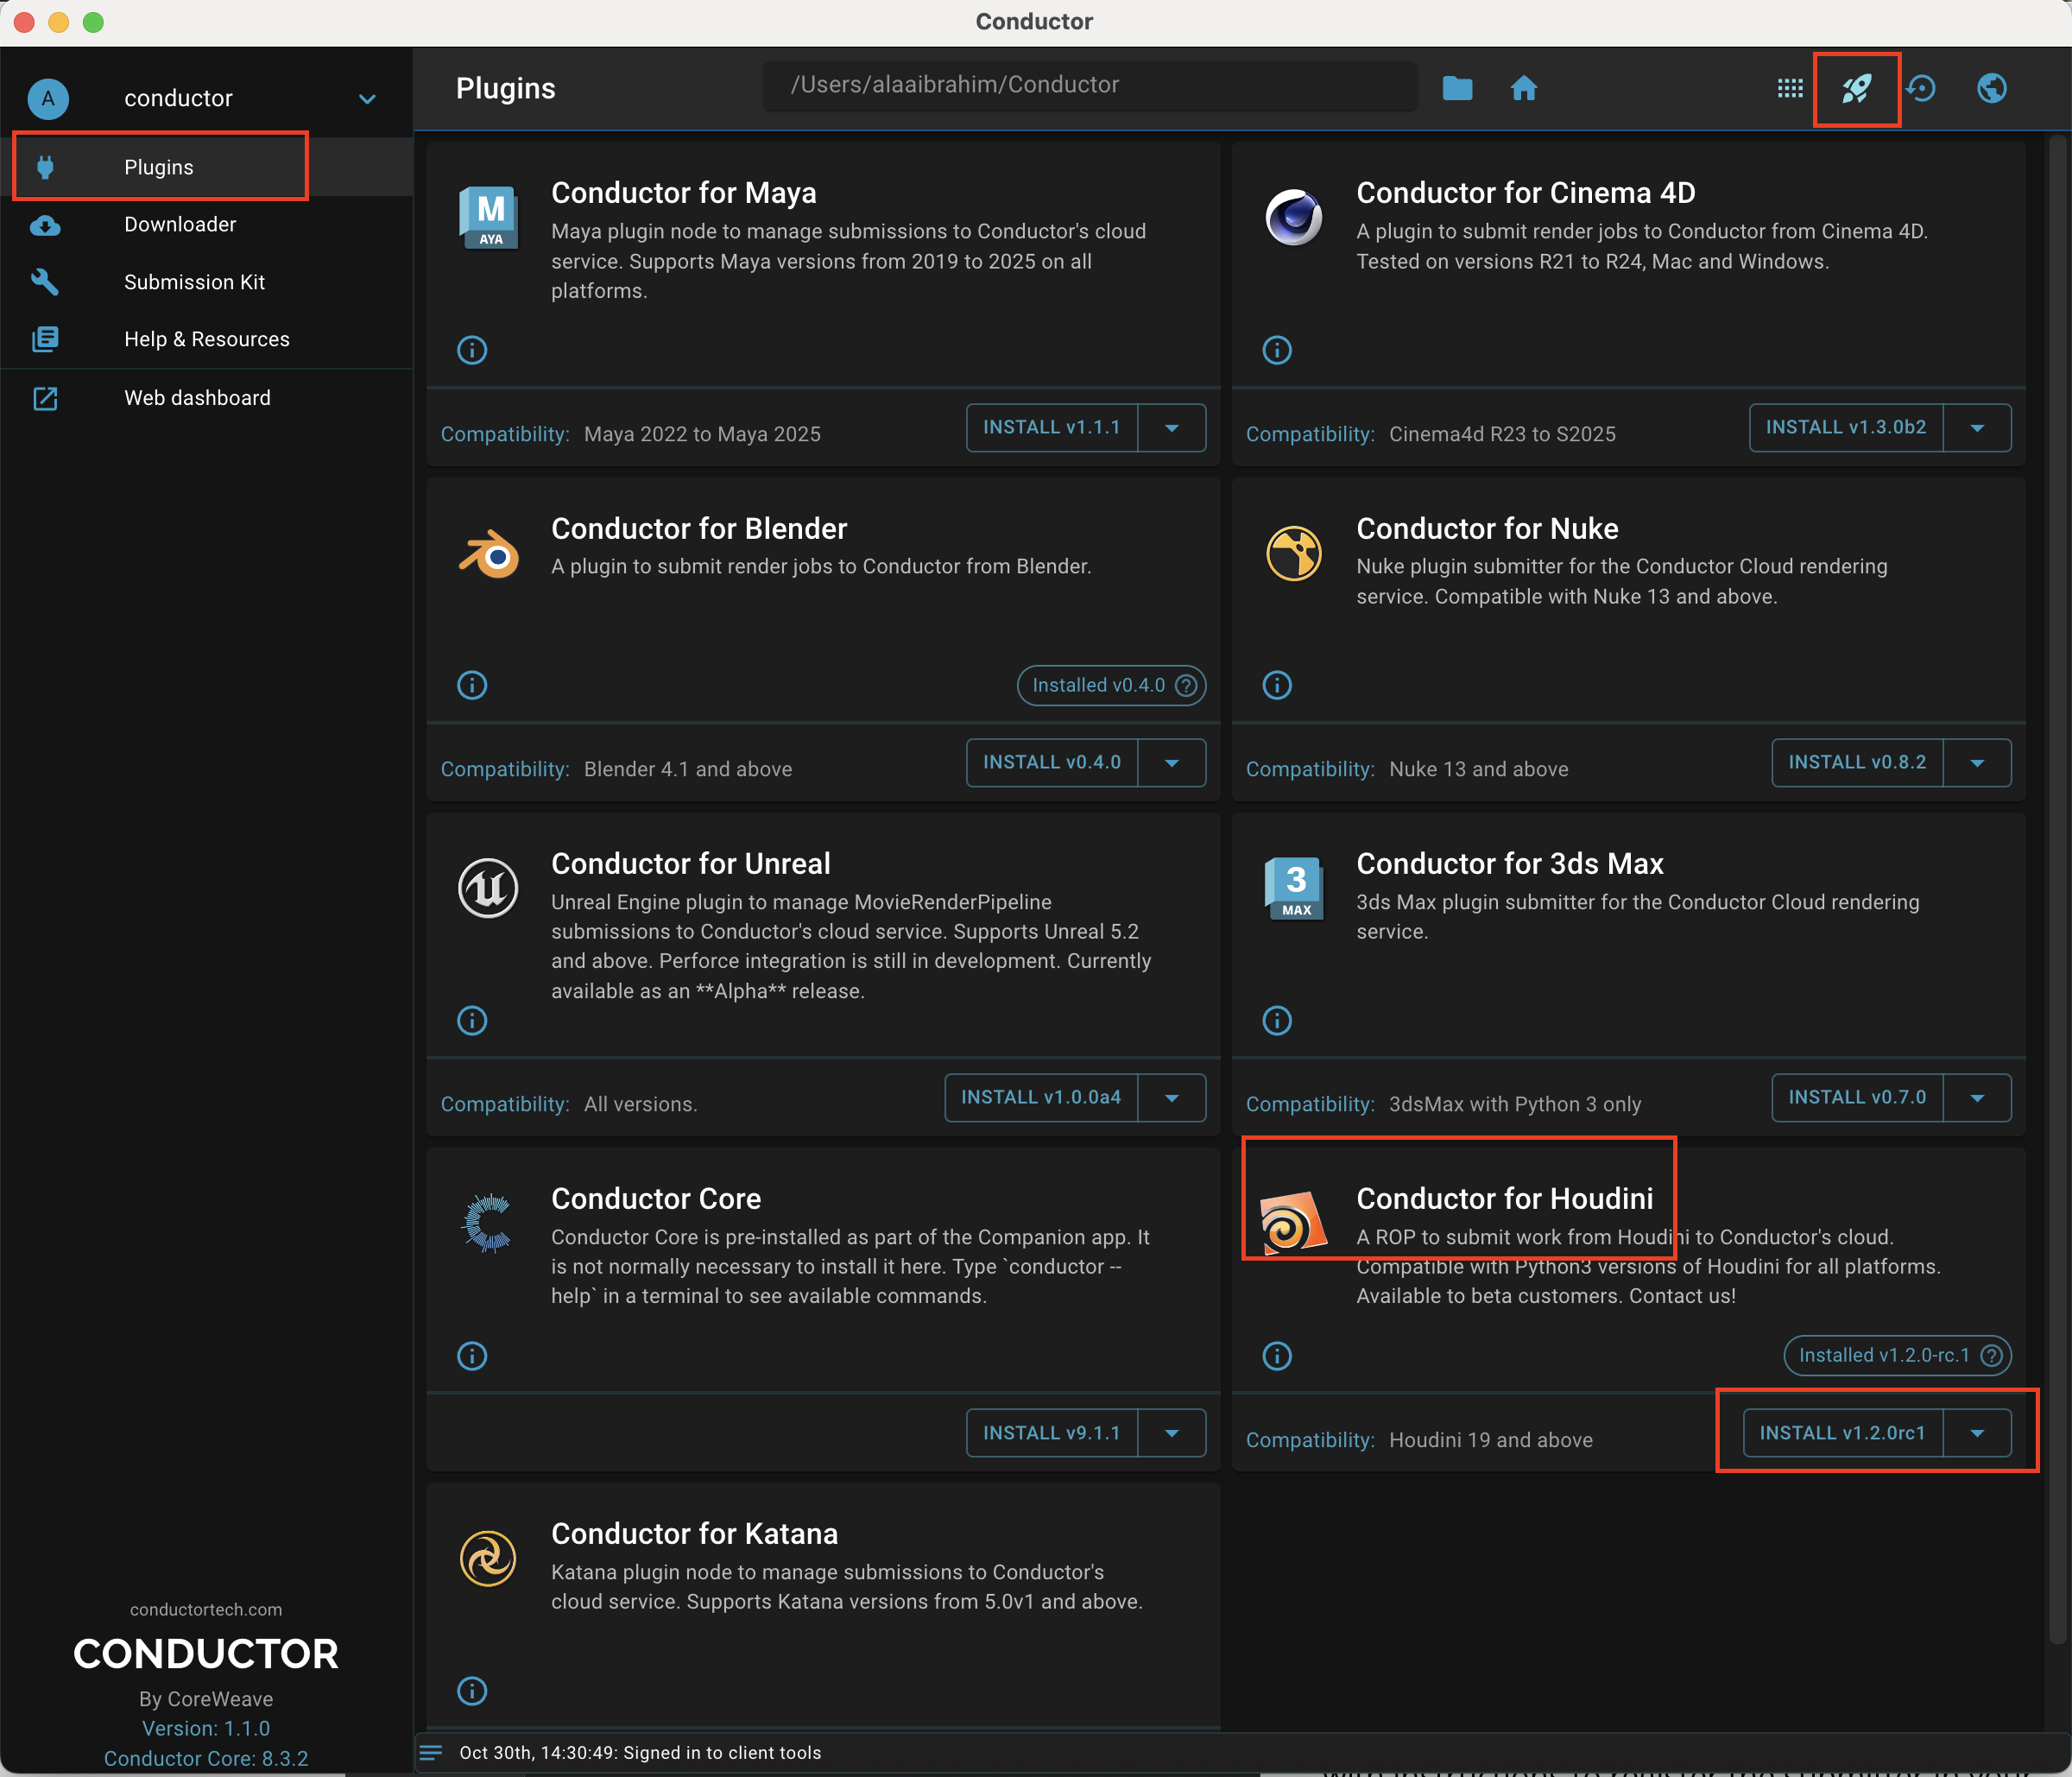
Install the most recent Conductor for Houdini plugin using the Companion App. Make sure that the button "Enable plugin pre-releases" on the top right is enabled.
Configure the Conductor Scheduler
Load your Houdini PDG graph and in the TOP Network container create a Conductor Scheduler node: select Schedulers → Conductor Scheduler.
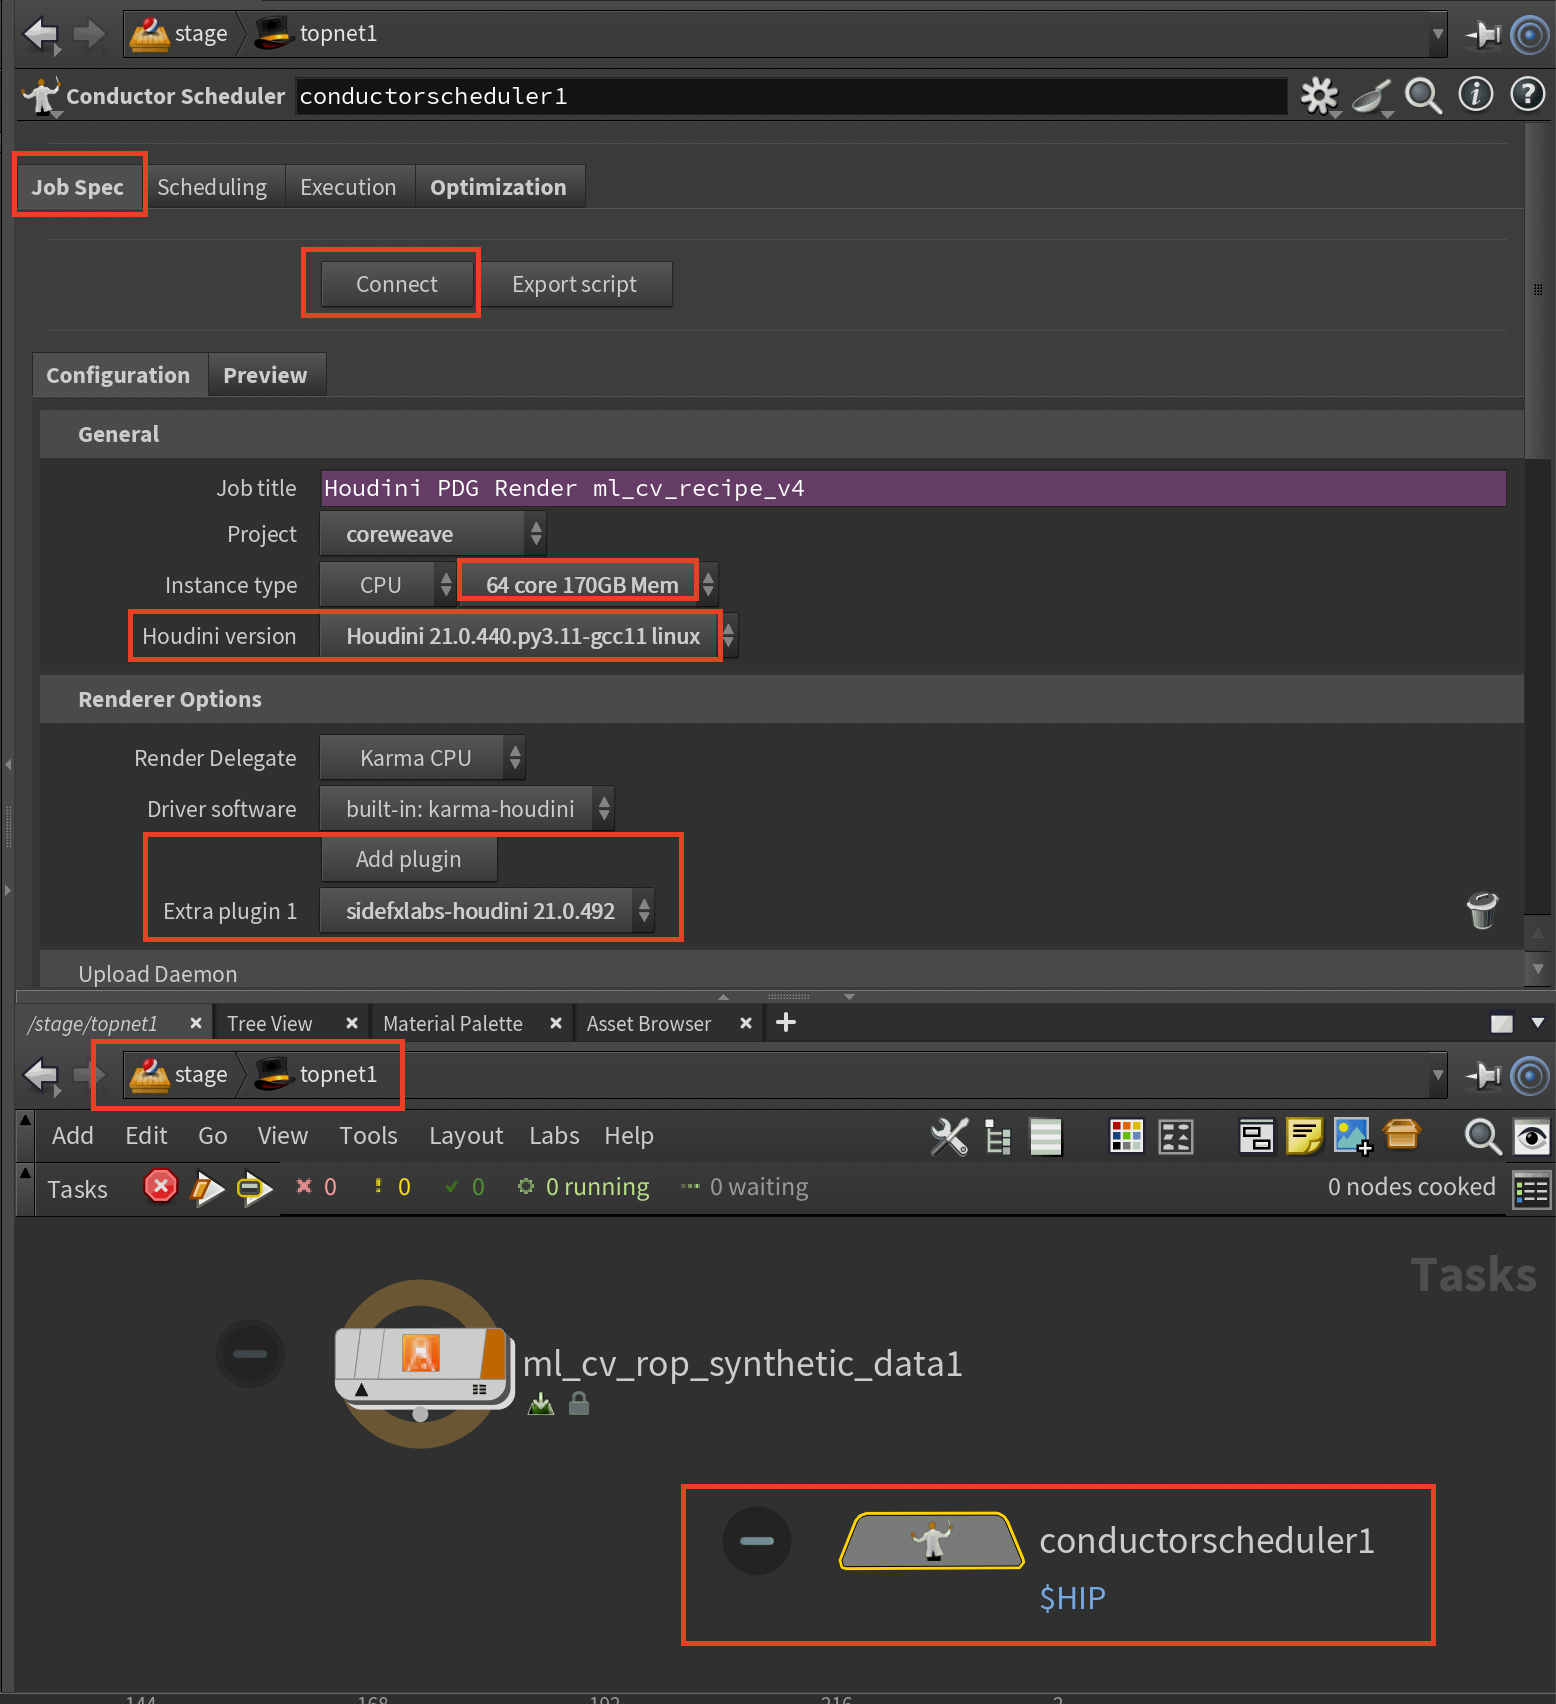
Select the Conductor Scheduler node and in the Job Spec tab, click the "Connect" button to connect to Conductor. You may be asked for your Conductor account credentials.
Select your project from the dropdown menu.
Under "Instance Type", select a high spec instance, e.g. 32-64 core for optimal performance.
Modify the Houdini version if needed.
If your PDG graph contains SideFX Labs nodes, you must click "Add Plugin" and select "sidefxlabs-houdini.x". The version of the SideFX Labs is selected for you that matches the selected Houdini version above.
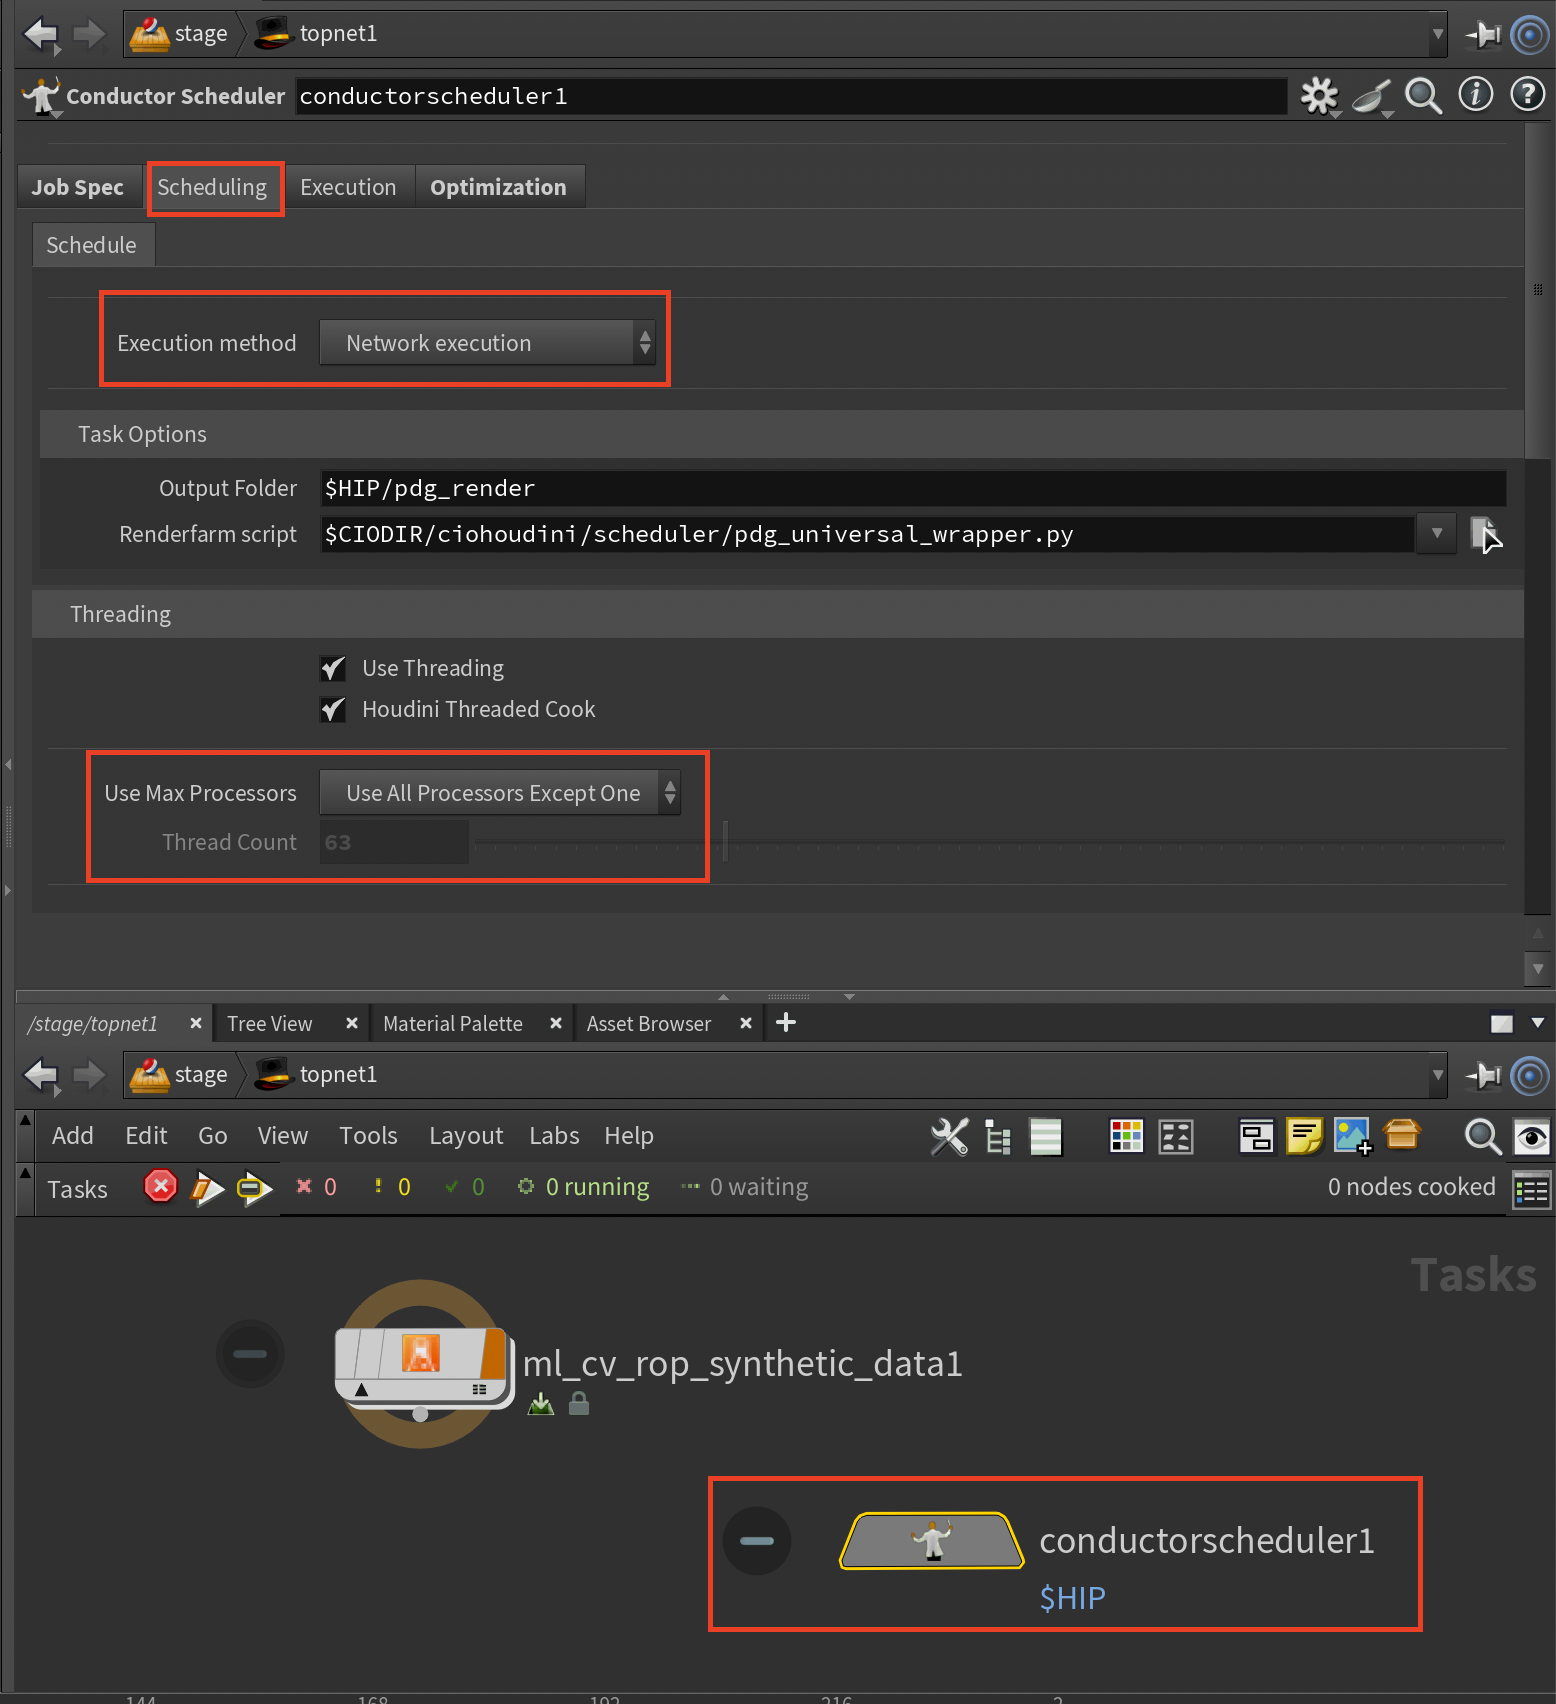
Click on the Scheduling tab and keep the Execution method as the default: "Network execution".
Under Threading, keep "Use Threading" and "Houdini Threaded Cook" enabled.
Under "Use Max Processors" keep it as the default value "Use All Processors Except One" or modify it to "User Specified Thread Count" and enter the thread count in the next row. You want to select as many processors as possible for optimum performance of your job.
Assign the Scheduler
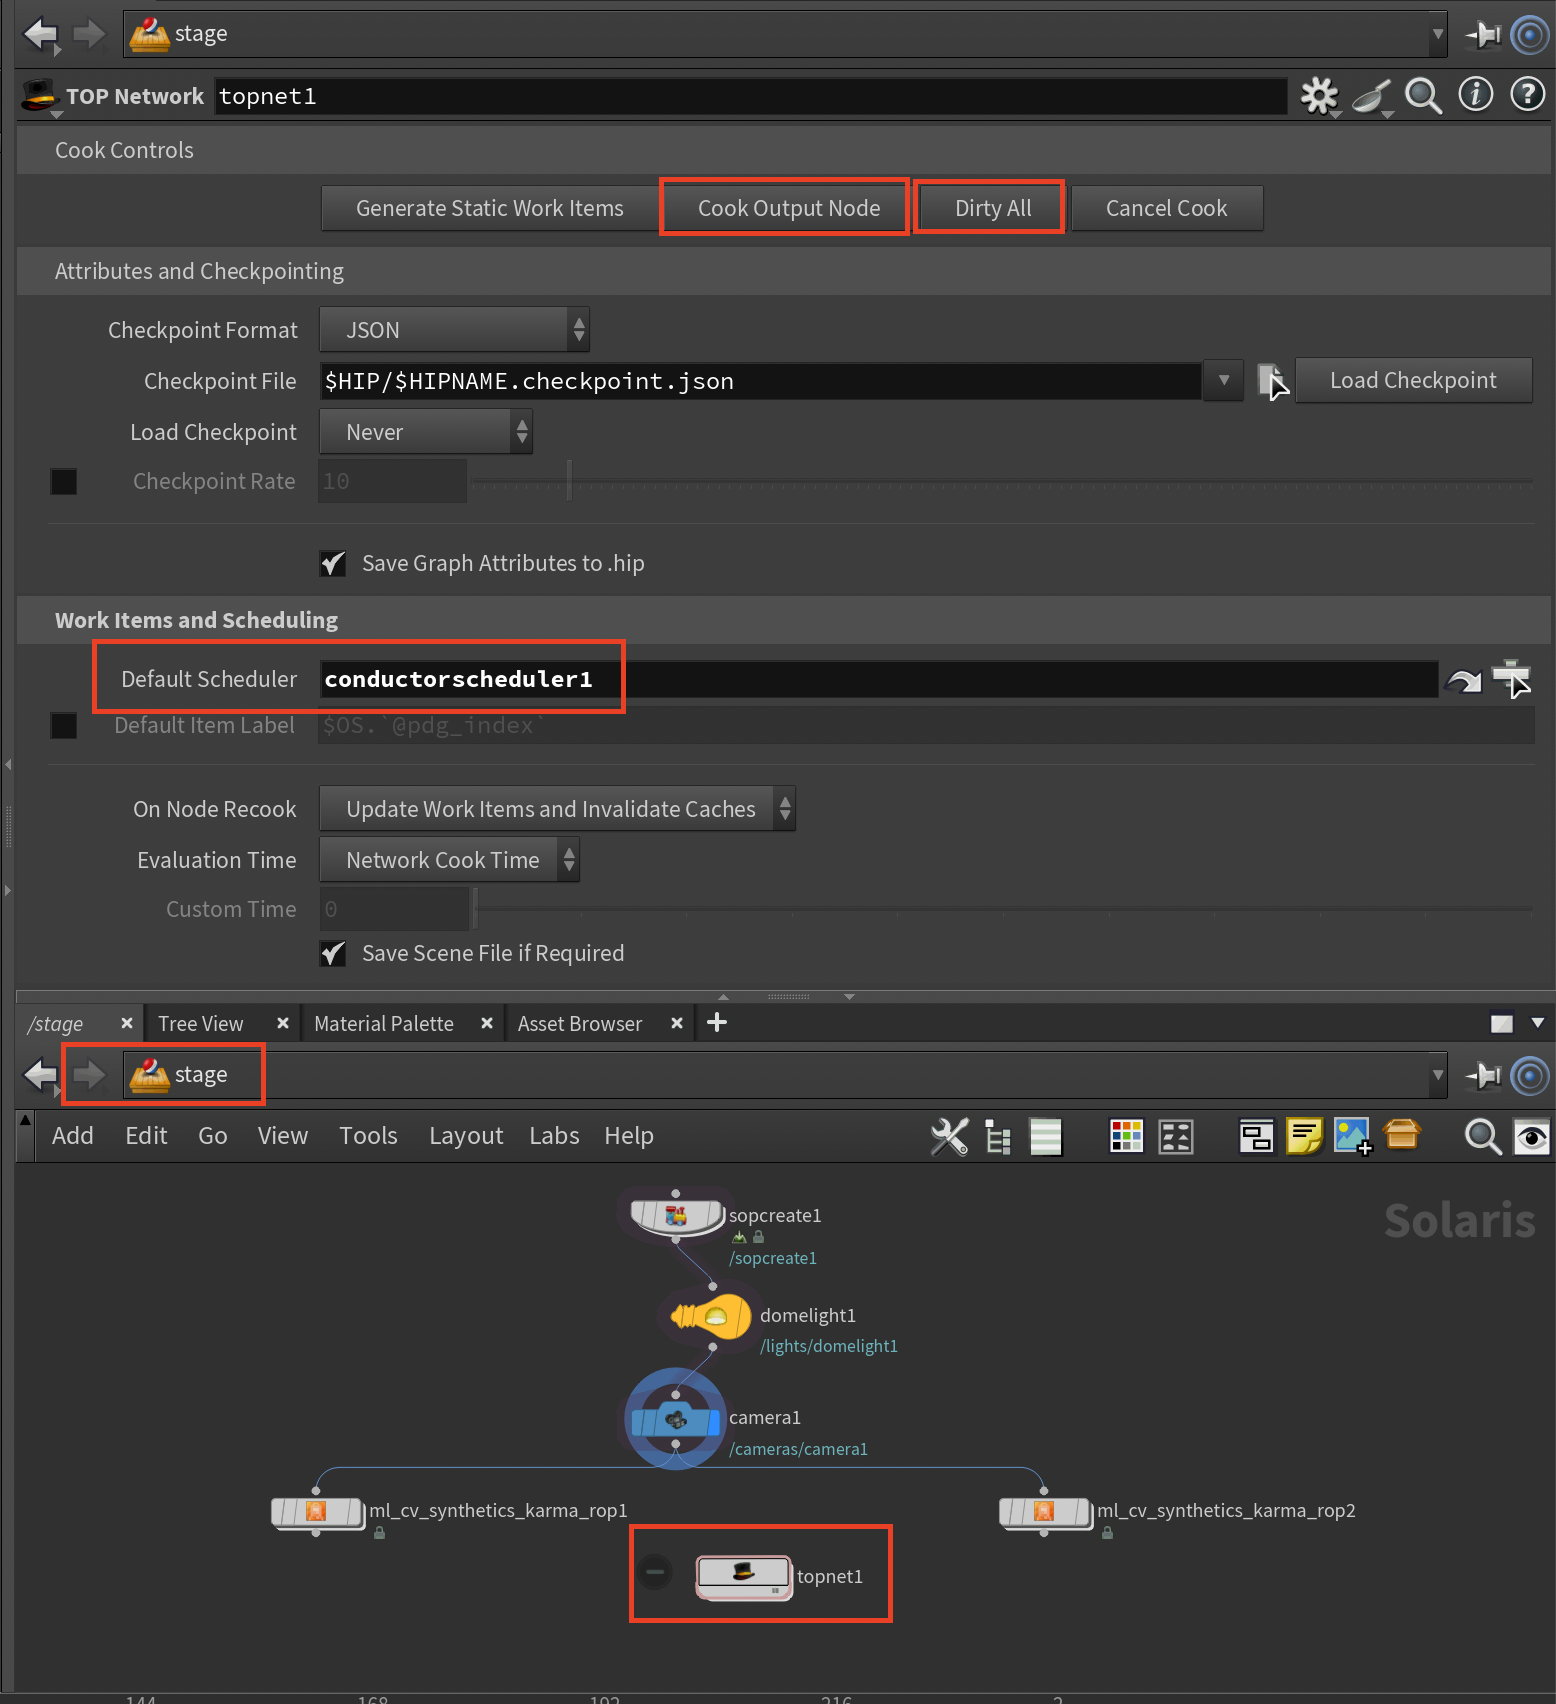
Select your TOP Network node and enter the name of your Conductor Scheduler, e.g. "conductorscheduler1" as the Default Scheduler of the TOP Network node.
Please note that if nodes in the TOP Network container have a scheduler name in their "Top Scheduler Override" parameter of their "Schedulers" tab, you need to remove that entry or override it with your Conductor Scheduler node name.
Submit Your Job
Save your Houdini scene. (At the time of writing this tutorial, the Houdini scene is not saved automatically during submission. You have to do this step.)
With the TOP Network node selected, click "Dirty All" then "Cook Output Node". This will trigger the on_schedule callback in the Conductor Scheduler.
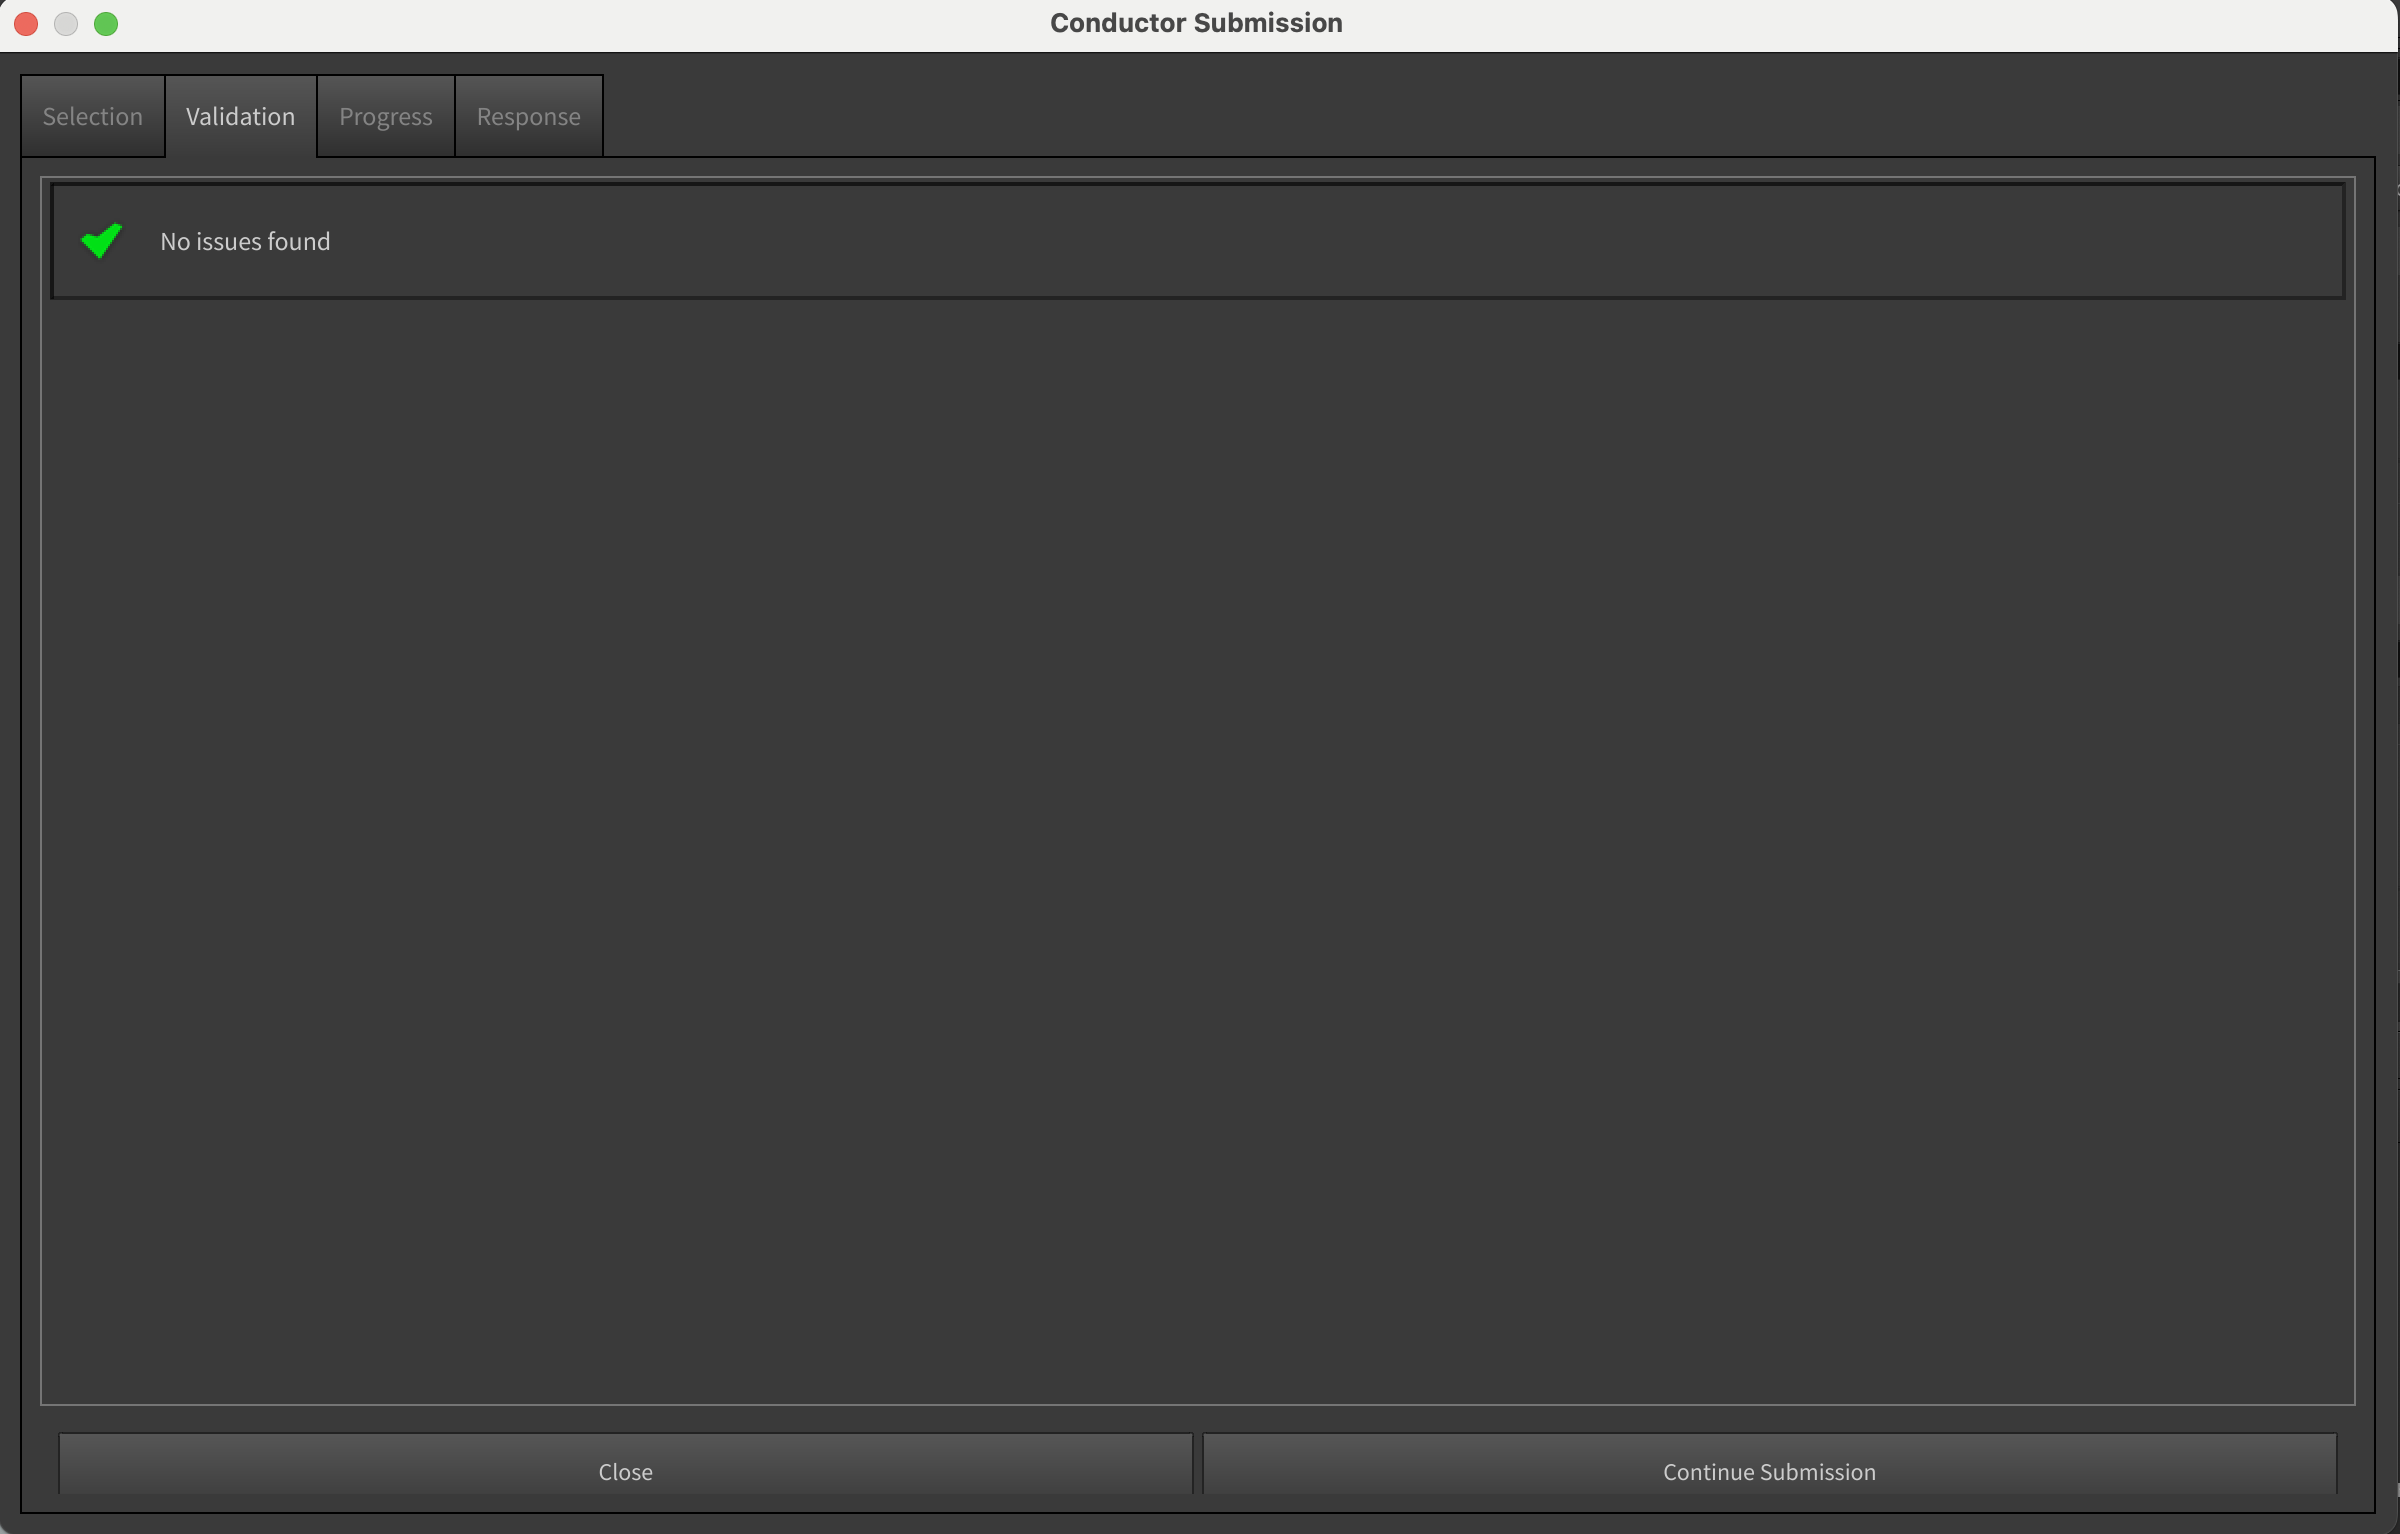
In a few seconds, you should see the Conductor Submission Dialog. Click "Continue Submission".
It will take a while to upload your files to Conductor.

Finally you should see the Response tab of the Conductor Submission Dialog. Click on the "Go to dashboard" which will take you to the job page in the Conductor Dashboard.
Monitor and Download
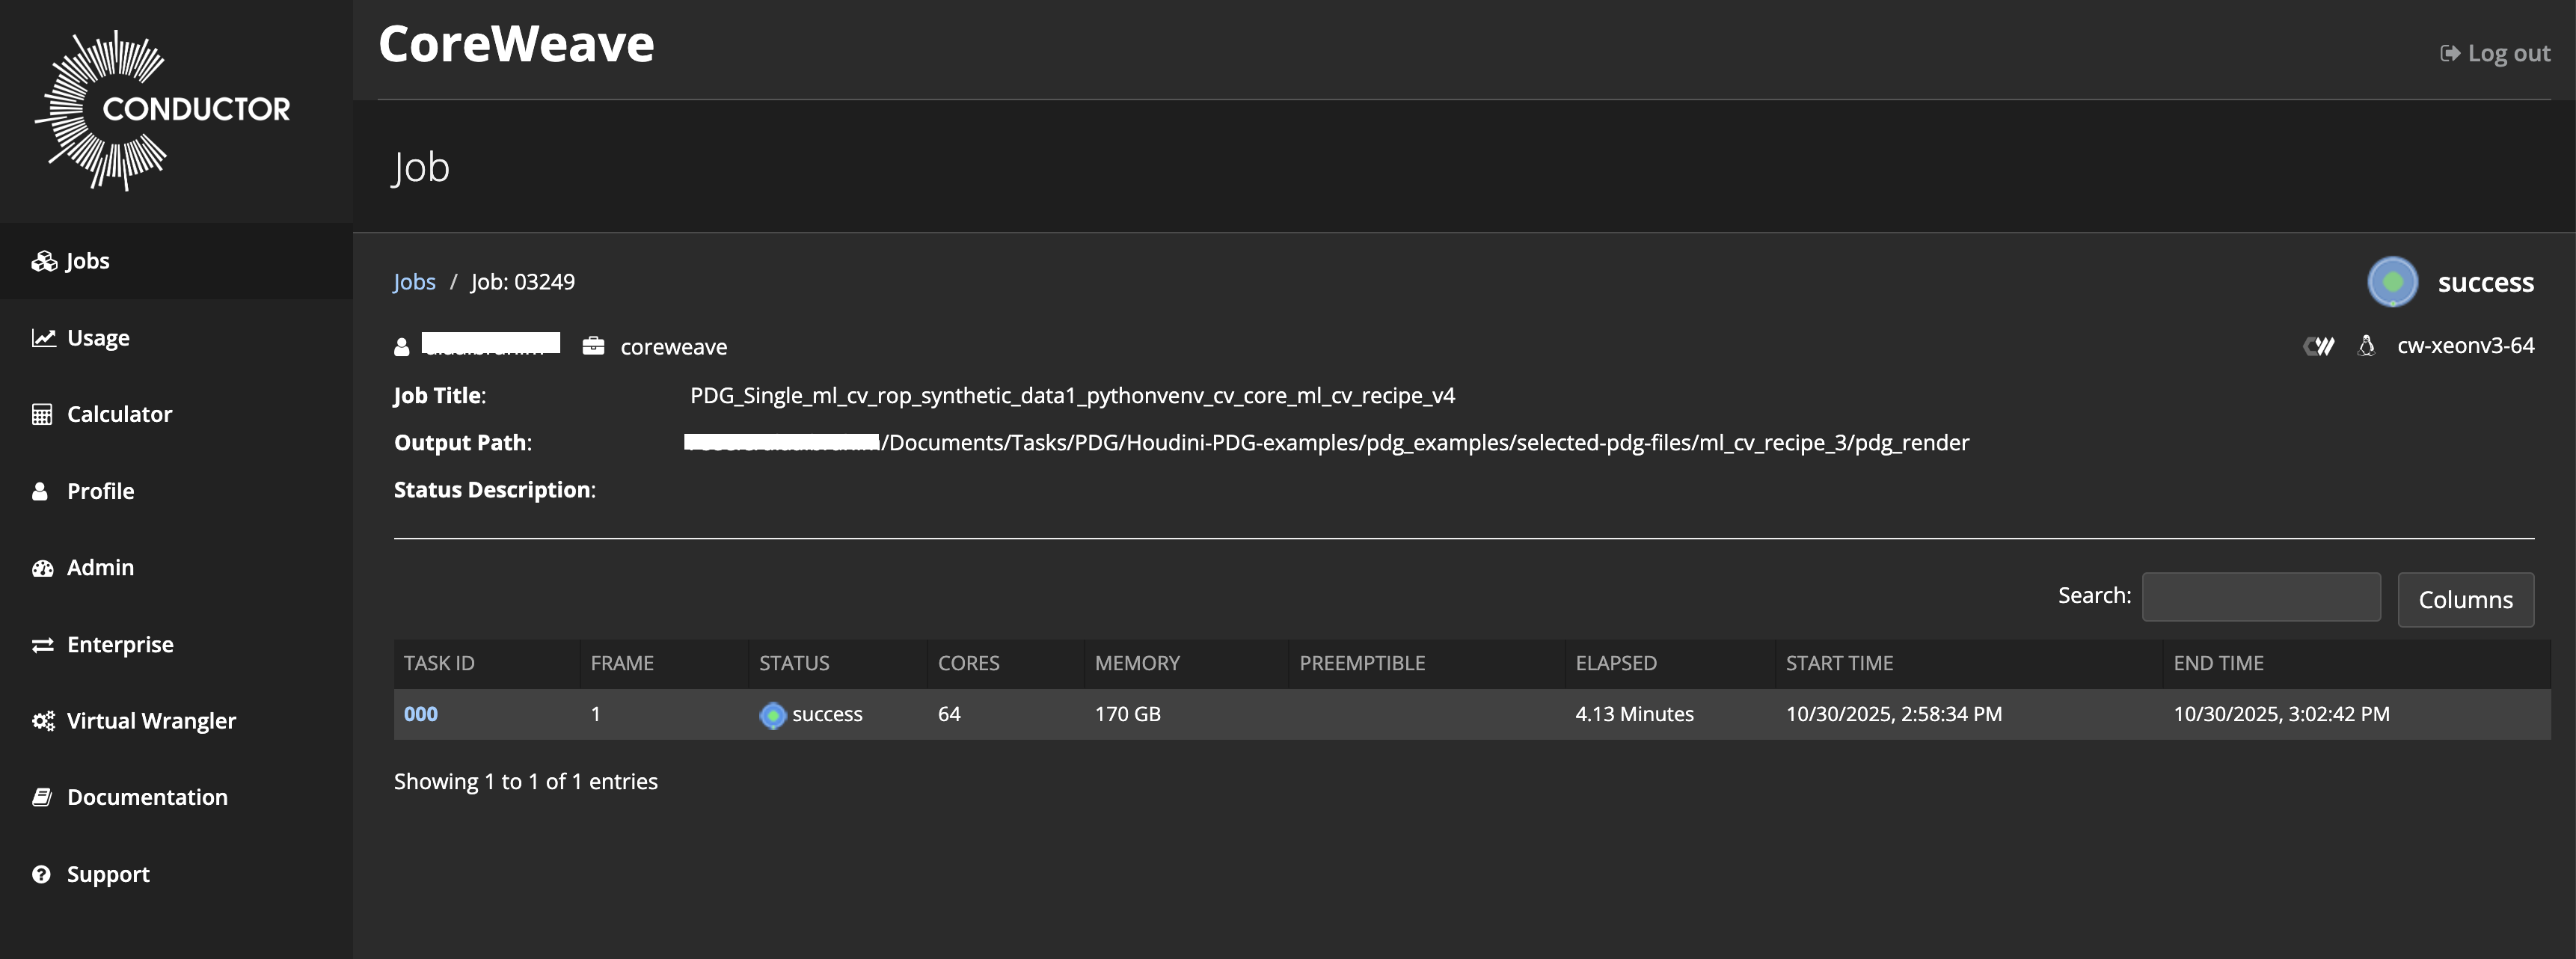
In the Conductor Dashboard monitor your job and when complete, click on the task ID to view a detailed job log.
There are two methods to download your files:
-
Using the Conductor Companion App
-
Using the download command
Be sure to visit the Houdini PDG Conductor Scheduler reference page and the Conductor Companion App for more info.