Katana Renderman Example
Get Prepared
In this tutorial, you'll use the Submission Kit to render a Katana-PRman project.
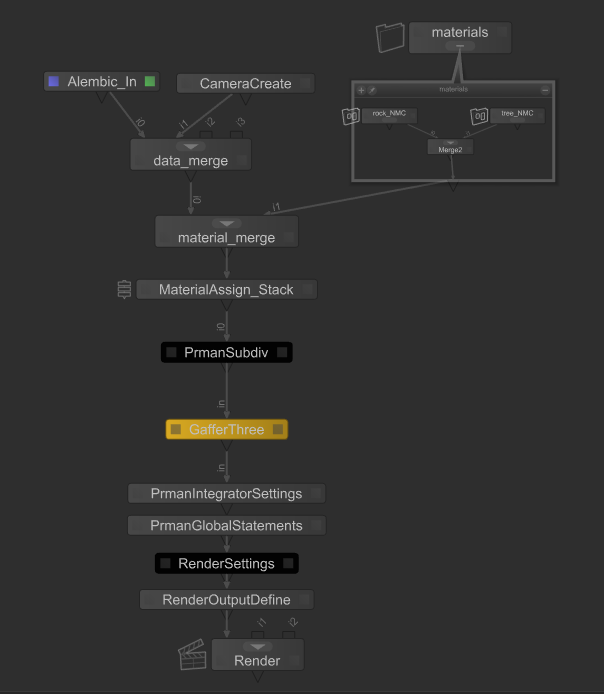
We don't provide a downloadable demo scene for this tutorial, so go ahead and build a simple scene with some objects and file textures. Your node graph should look similar to the image below.
Windows Paths
When your scene and assets are shipped to Conductor, the filesystem hierarchy is set to mirror your local filesystem. However, the render nodes run Linux so there are no drive letters in the paths. For this reason, it's best to use parameter expressions to make paths relative to the Katana project file. By using expressions, your project file becomes portable across different platforms.
Let's suppose you have the following project:
C:/Users/julia/projects/kat/ocean.katana
and it contains the following assets:
C:/Users/julia/projects/kat/assets/3d/shark.abc
C:/Users/julia/projects/kat/assets/2d/shark.jpg
C:/shared/assets/3d/water_surface.abc
C:/shared/assets/2d/water_surface.jpg
and the render path in your RenderOutputDefine node is:
C:/Users/julia/projects/kat/renders/out.#.exr
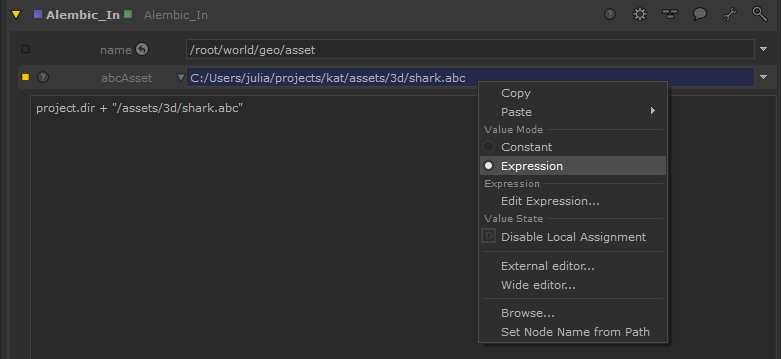
To make these assets relative to the project, right-click on each filename parameter, choose 'Expression' as the Value Mode and enter the following expressions respectively.
project.dir + "/assets/3d/shark.abc"
project.dir + "/assets/2d/shark.jpg"
project.dir + "/./../../../shared/assets/3d/water_surface.abc"
project.dir + "/../../../../shared/assets/2d/water_surface.jpg"
Similarly, for the renderLocation:
project.dir + "/renders/out.#.exr"
You can see the fully resolved expression in the parameter, and your project should render locally just fine.
Configure the Submission
- Open the Companion app, sign in to your account, and go to the Submission Kit page.
General
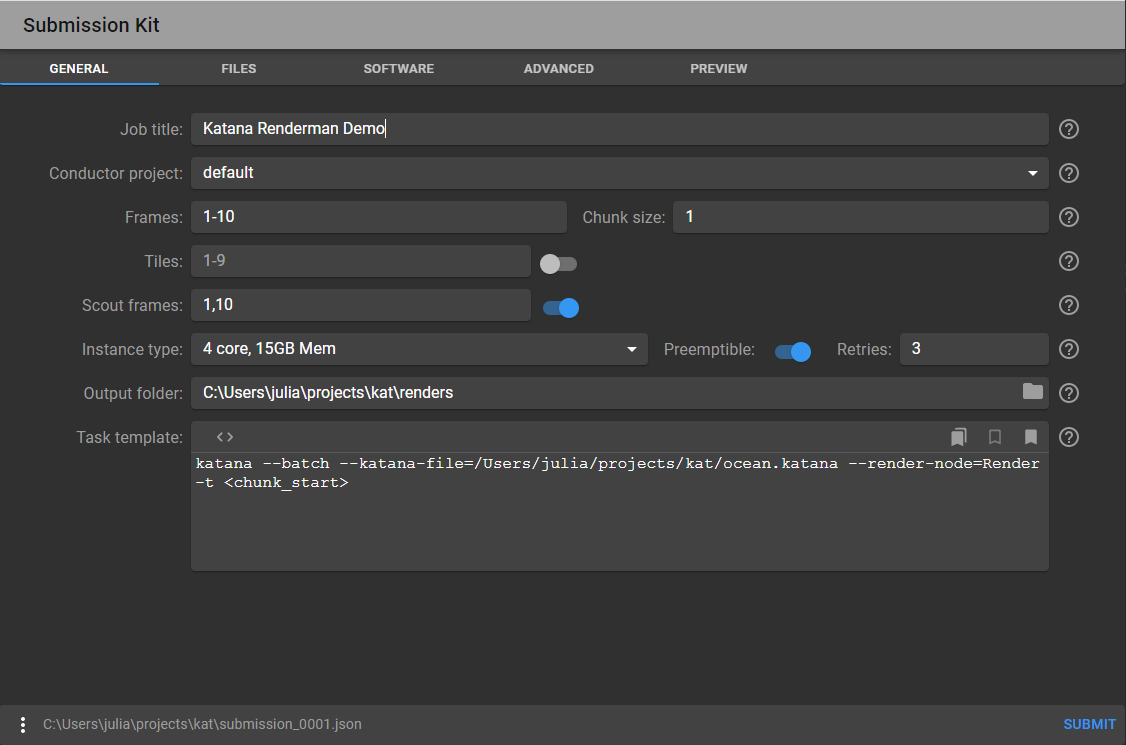
- Fill in the form fields in the General tab as illustrated below. You may have to choose a different instance type and a project that exists in your account.
- Browse for the directory where your project renders to.
Note
The button to choose a directory may be labeled "Upload" on your computer. Don't worry, nothing gets uploaded at this time.
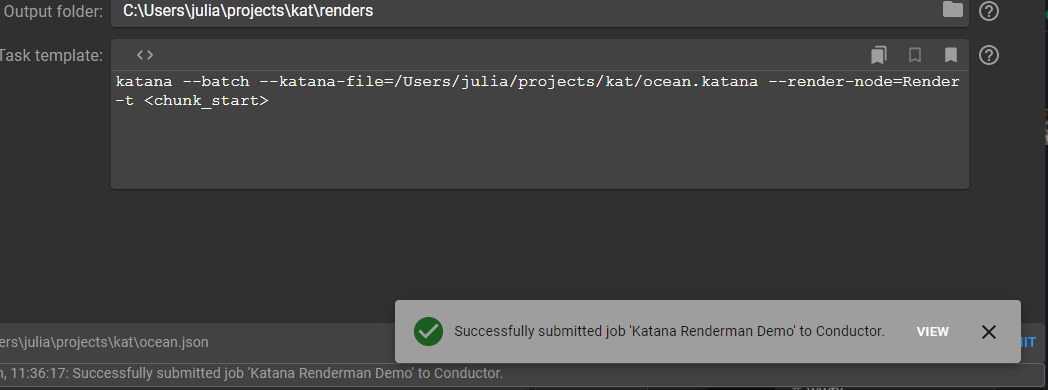
Task Template
The Task Template is where you specify the batch command to run on each render node in the cloud.
- Paste the following command there. Be sure to adjust paths for your setup.
katana --batch --katana-file=/Users/julia/projects/kat/ocean.katana --render-node=Render -t <chunk_start>
You can read more about Katana's batch mode here.
The <chunk_start> token is replaced with each frame number as specified in the Frames field.
If you go to the Preview tab you'll see how the batch commands are resolved in the tasks_data section.
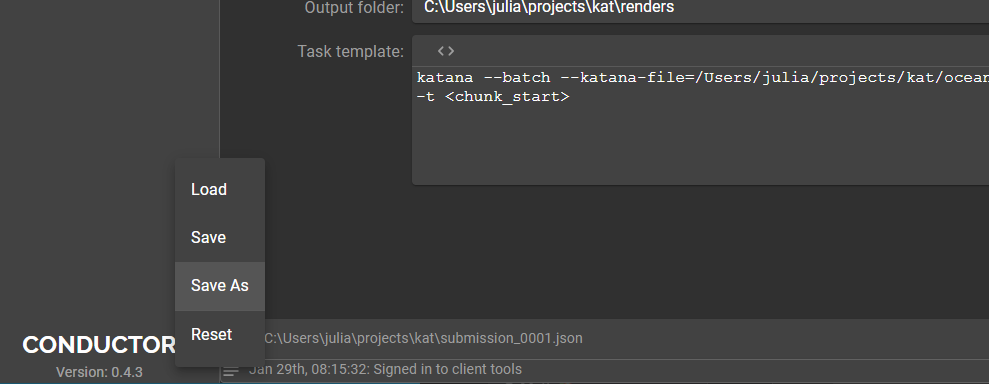
Take a moment to save the state of the submission.
- Choose Save As from the More menu in the bottom left corner of the panel and save it in your working directory as
katana_test.jsonor similar.
Files
- Go to the Files tab and use either the folder or the file icon to browse for all the assets your project depends on. Don't forget to include the Katana file itself.
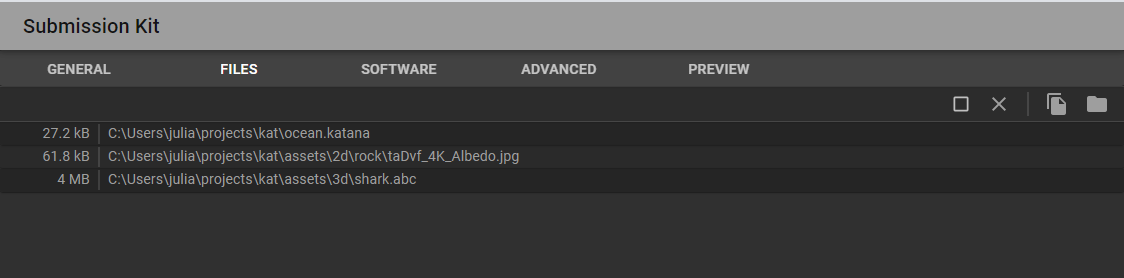
Head over to the Preview tab if you would like to check that the files are included in the upload_paths field.
Software
You must specify all the host software and plugin services you for them to be made available to the render nodes, and to have their environments set.
- Go to the Software tab and choose a recent version of Katana and the appropriate Renderman plugin.
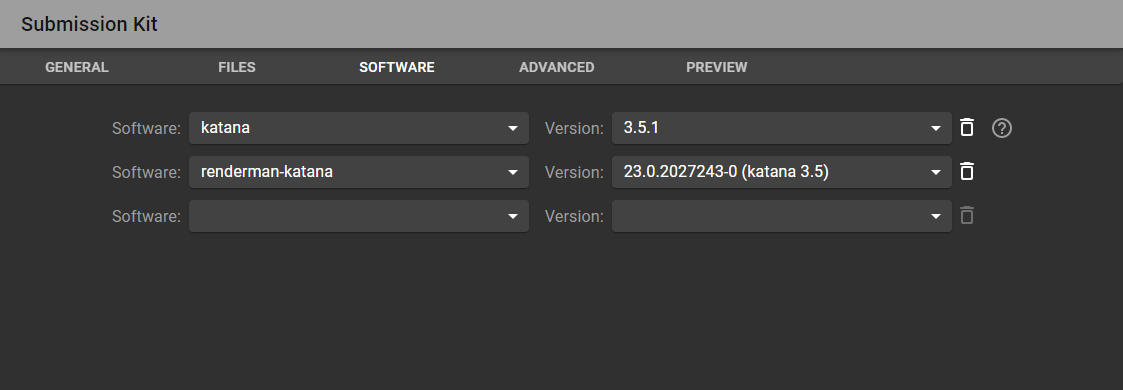
If you head back to the Preview tab now you'll see the environment section contains several paths required for rendering Katana with Renderman.
Submit
You can now press Submit. You should see some activity in the status bar. If you click the small icon in the status bar you'll see the log window, where you can identify submission errors if any. If the submission is successful you'll be presented with a link to your job in Conductor's web UI.
Appendix
Environment Variables
Should you need to specify any environment variables, you can add them in the Advanced tab.
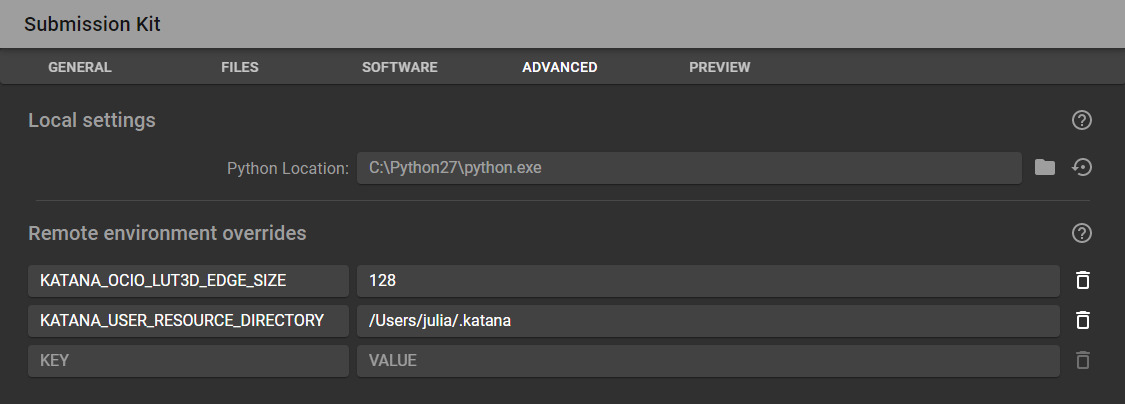
In the screenshot above, the variable that points to the user's resource directory has been added. In this case, you would also need to add the directory in the Files tab so it gets uploaded.
Remember to use forward slashes and omit the drive letter in path variables, as they apply to the remote render node environment, which is Linux.
See the full list of Katana environment variables