Submission Kit Reference
This section provides a comprehensive description of the Submission Kit's features.
If you are looking to get up and running quickly, check out some of our example tutorials in section following this one. The Blender example takes just 5 minutes, and can be completed without having Blender installed on your workstation or computer. If you have Maya installed, you can try the more complex Arnold Ass example.
Introduction
There are several ways to submit jobs to Conductor. You can use tools embedded in your DCC, integrations with other dispatchers like Tractor, or you can construct submissions through the Python API. In all cases, the data sent from your computer to the cloud follows the same format. It describes tasks to be carried out, hardware to run on, the software required to run them, and the environment in which to process.
The General, Files, Software, and Advanced panels in the Submission Kit give you control over these properties, and help you to construct a valid submission for any host DCC without the need to write code. You can view the raw submission object at any time in the Preview panel before submitting it to Conductor.
The sections below cover each of these panels in detail.
General
The General tab contains some essential variables and settings for job submissions. Below is a list of the fields included in this tab, along with definitions and some additional details for reference.
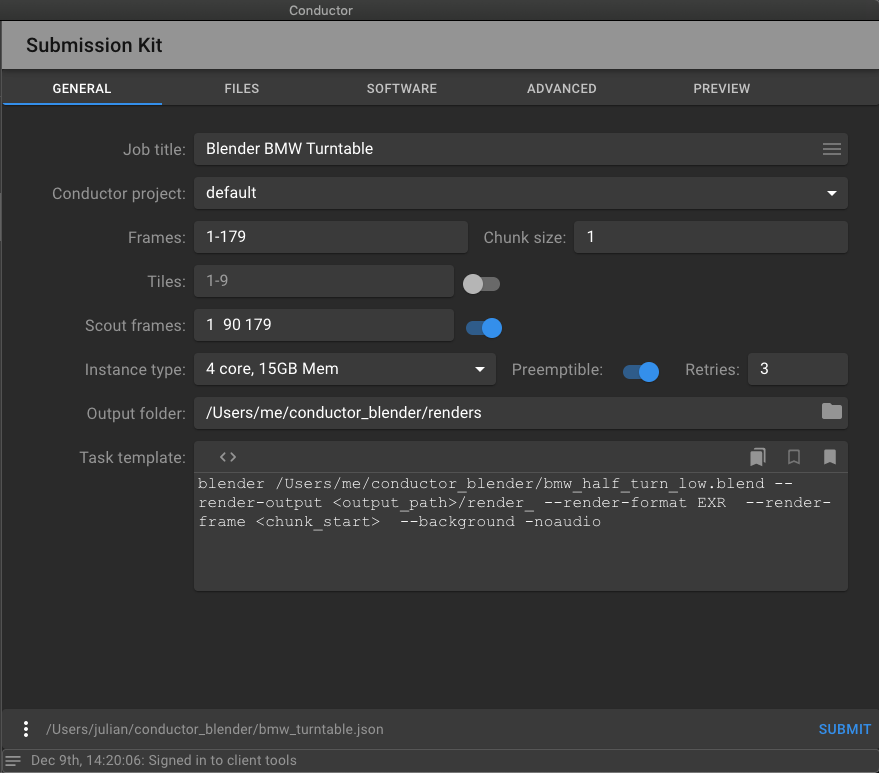
Field Labels Defined
- JOB TITLE
- A title to identify your job in the Conductor web dashboard.
- CONDUCTOR PROJECT
- The project helps you to organize your submissions. The menu is populated when the companion app is started. If you add a project via the web dashboard after the companion app started, you'll need to restart it.
- FRAMES
- The Frames field provides a set of numbers to use in the task command. To specify frames, enter a list of arithmetic progressions. In most cases, this will be a simple range like
1-100. It's also possible to specify any arbitrary set of numbers in this way. Use spaces and/or commas to separate each progression. Example:
1,7,10-20, 30-60x3, 1001 1050
If you specify frames incorrectly, you'll find that no tasks are generated. See the Preview tab to check task generation.
See the Task template section to understand how frames are used to construct task commands.
- CHUNK SIZE
- A chunk is the set of frames handled by one task. If for example Chunk size is 4 and there are a 100 frames, then 25 chunks are generated. If the Tiles field is not being used, then there will be one task generated per chunk.
- TILES
- The Tiles field allows you to split a large render into smaller pieces. For every chunk of frames, a task is generated for each tile number. You specify tiles in exactly the same way you specify frames. To generate 9 tile numbers for example, enter
1-9
- SCOUT FRAMES
- Scout frames are numbers that indicate a set of tasks to to render immediately. When the submission reaches Conductor, only those tasks containing the specified scout frames are started. Other tasks are set to a holding state.
Note
If chunk_size is greater than one, then you may find extra frames are rendered that were not listed as scout frames. The smallest unit of execution is a task, and there is no way to specify that part of a task should be started and another part held.
- INSTANCE TYPE
- Specify the hardware configuration used to run your job. Higher specification instances are potentially faster and able to handle heavier scenes. You are encouraged to run tests to find the most cost-efficient combination that meets your deadline.
- PREEMPTIBLE
- Preemptible instances are less expensive to run than non-preemptible. The drawback is that they may be stopped at any time by the cloud provider. The probability of an instance being preempted rises with the duration of the task. Conductor does not support checkpointing, so if a task is preempted it is started from scratch on another instance.
- RETRIES
- Set the number of times to retry a failed task.
- OUTPUT PATH
- Specify the location where files are written to. When tasks are complete, you'll be able to download any rendered files to this folder on your computer.
There are some constraints to be aware of:
- All files produced by the job must be written to a location below the output-path or they won't be available.
- None of the assets you upload may exist anywhere below the output path.
Note
Conductor uses a read-only disk to make inoput assets available. It also provides a writable space for output files on a different disk. The paths for these two spaces are mounted on the render node and must not conflict with each other.
- TASK TEMPLATE
- Use this text area to construct the commands to run on remote instances. To generate a list of different commands, for example,
render -f1, render -f2, .... render -f100, there are a set of tokens that can be used to produce different values in each task. These values are derived from the Frames, Chunk size, and Tiles fields mentioned earlier. Tokens must be wrapped in angle brackets <...>
- <chunk_start> provides the first value of each chunk. If Chunk size is set to 1 then chunk
Files
Use the Files tab to upload the necessary assets for your submission.
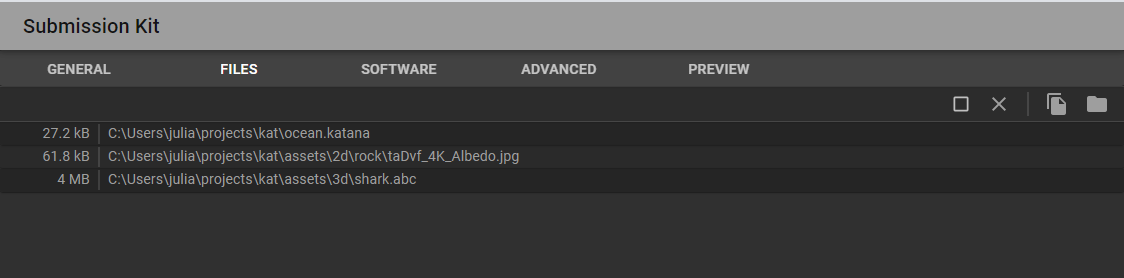
As shown in fig. 2 above, there are four icons located in the upper-right section of the Files tab. Click on the folder icon to browse for directory assets, and the file icon to browse for file assets. The square icon enables you to select assets from the list, and if necessary, you can click the "X" to remove any selected assets.
You can head over to the Preview tab if you would like to check that the files are included in the upload_paths field.
Software
Use the Software tab to select your software and plugins. You must specify all the host software and plugin services you need for them to be made available to the render nodes, and to have their environments correctly set.
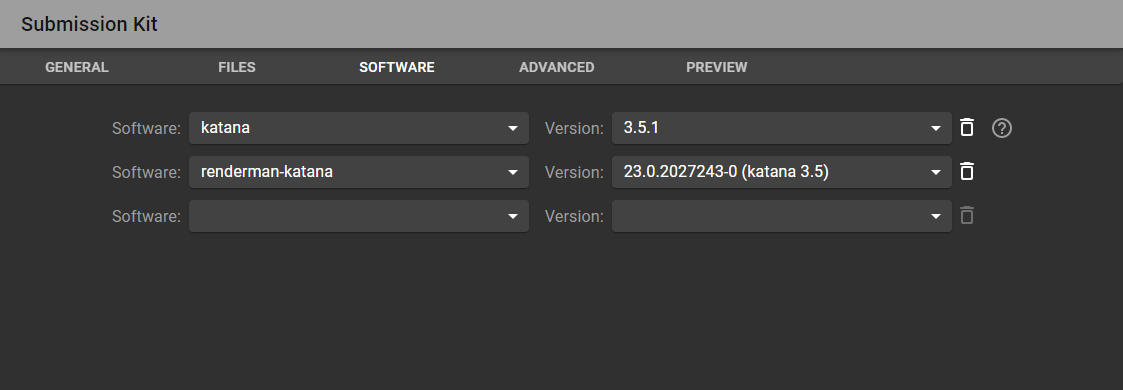
After selecting the appropriate versions, you can head back to the Preview tab, where you'll see that the environment section now contains the required software paths.
Advanced
The Advanced tab contains two sections.
The first, labeled Local Settings, is used to identify the location of the Python 2.7 executable on your machine. Submissions are processed using Conductor's client side Python API, and therefore you need to ensure you have Python 2.7 available. In the Advanced tab, if the Python Location field is empty, press the reset button which will try to locate Python 2.7. If it fails, browse for a valid Python 2.7 installation on your system. If Python 2.7 is not installed, you'll need to install it before you can submit your job.
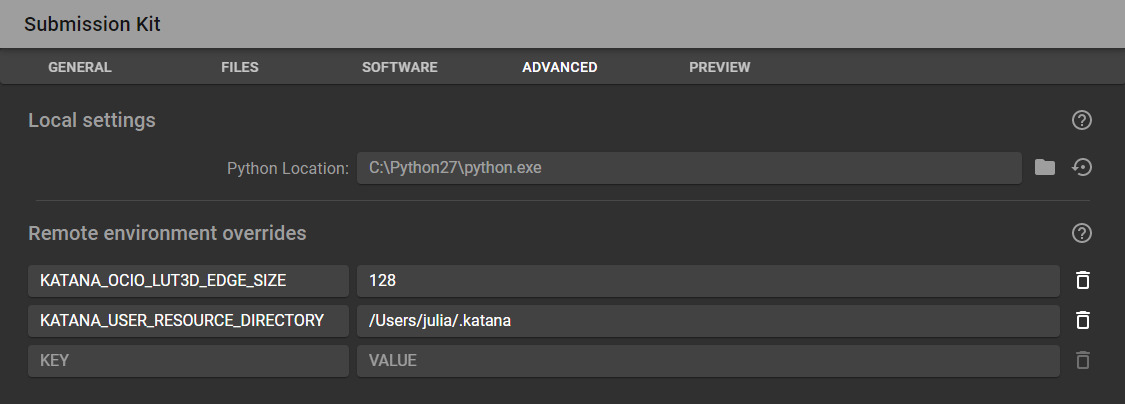
The second section, labeled Remote Environment Overrides, enables you to override existing environment variables and to specify new ones. In the screenshot above, the variable that points to the user's resource directory has been added.
When you select software versions in the Software tab, a number of environment variables are made available to the render nodes. Use the fields in the Remote Environment Overrides section to override them with new values, or to unset them.
For example:
-
The PATH variable gets set by Nuke, but you want to append your local scripts folder. You'll have to enter your new path joined to the existing path. Note the colon separator.
PATH : "/opt/thefoundry/nuke/11/nuke11.3v5:/Users/me/scripts"
-
You want to unset a variable that was set by some software package. Just leave the value empty.
MAYA_DEBUG : ""
Preview
The Preview tab displays the raw submission object, and is automatically updated as you populate the fields in the other four tabs. You can return to this tab at any point to confirm that your submission looks correct.
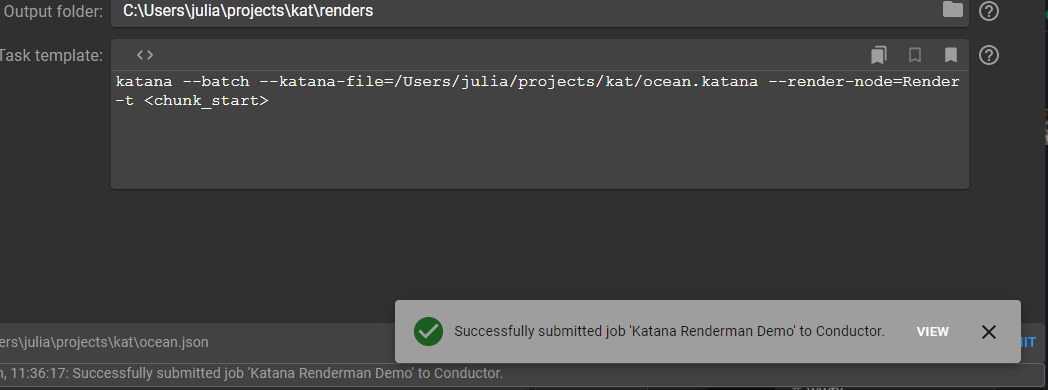
Submit
When you are ready, simply press the Submit button in the bottom-right corner.
You should see some activity in the status bar (the thin bar at the bottom of the application window). If you click the small icon in the left side of the status bar, you'll see the whole log, which allows you to identify errors, if any.
If the submission is successful, you'll be presented with a link to the job in Conductor's web UI (shown in fig. 5 below).
Custom Submissions
Once you have your submission set up the way you want it, you have the ability to save it as a custom submission. This will enable you to load the settings the next time you need to submit a similar job, so that you only need to make small changes and can get your job submitted faster and more efficiently.
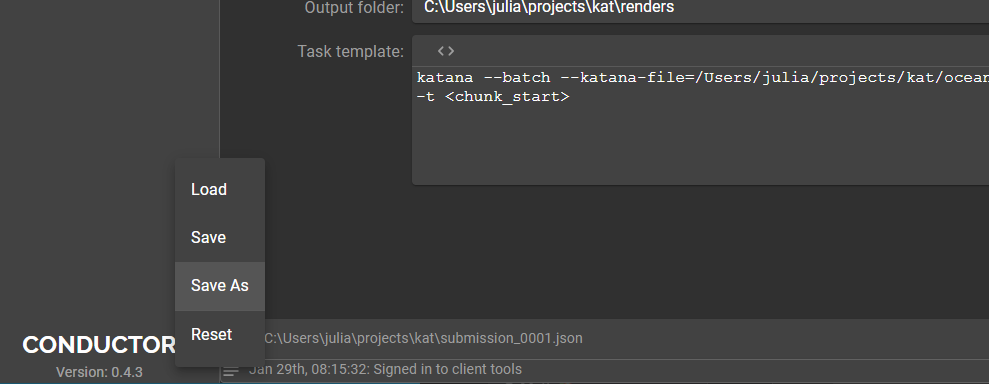
As shown in fig. 6 above in the General tab, click the icon in the bottom left with the three vertical dots (located above the status bar). Simply select Save As, and choose a location and file name.
The next time you want to load up this custom submission, return to this menu and select Load.