Blender Example
Get Prepared
You do not need to have Blender installed for this example, and there are no textures or other dependencies. The entire scene is contained in a single Blender file which you can download below.
- Download: bmw_half_turn_low.blend
- Move it to a working directory. For this example
/Users/me/conductor_blender/. You should substitute your actual directory where necessary.
The scene contains a camera flying 180 degrees around a pair of BMWs and is based on the popular BMW demo by Mike Pan from the Blender demos site.

Configure the Submission
- Open the Companion app, sign in to your account, and go to the Submission Kit page.
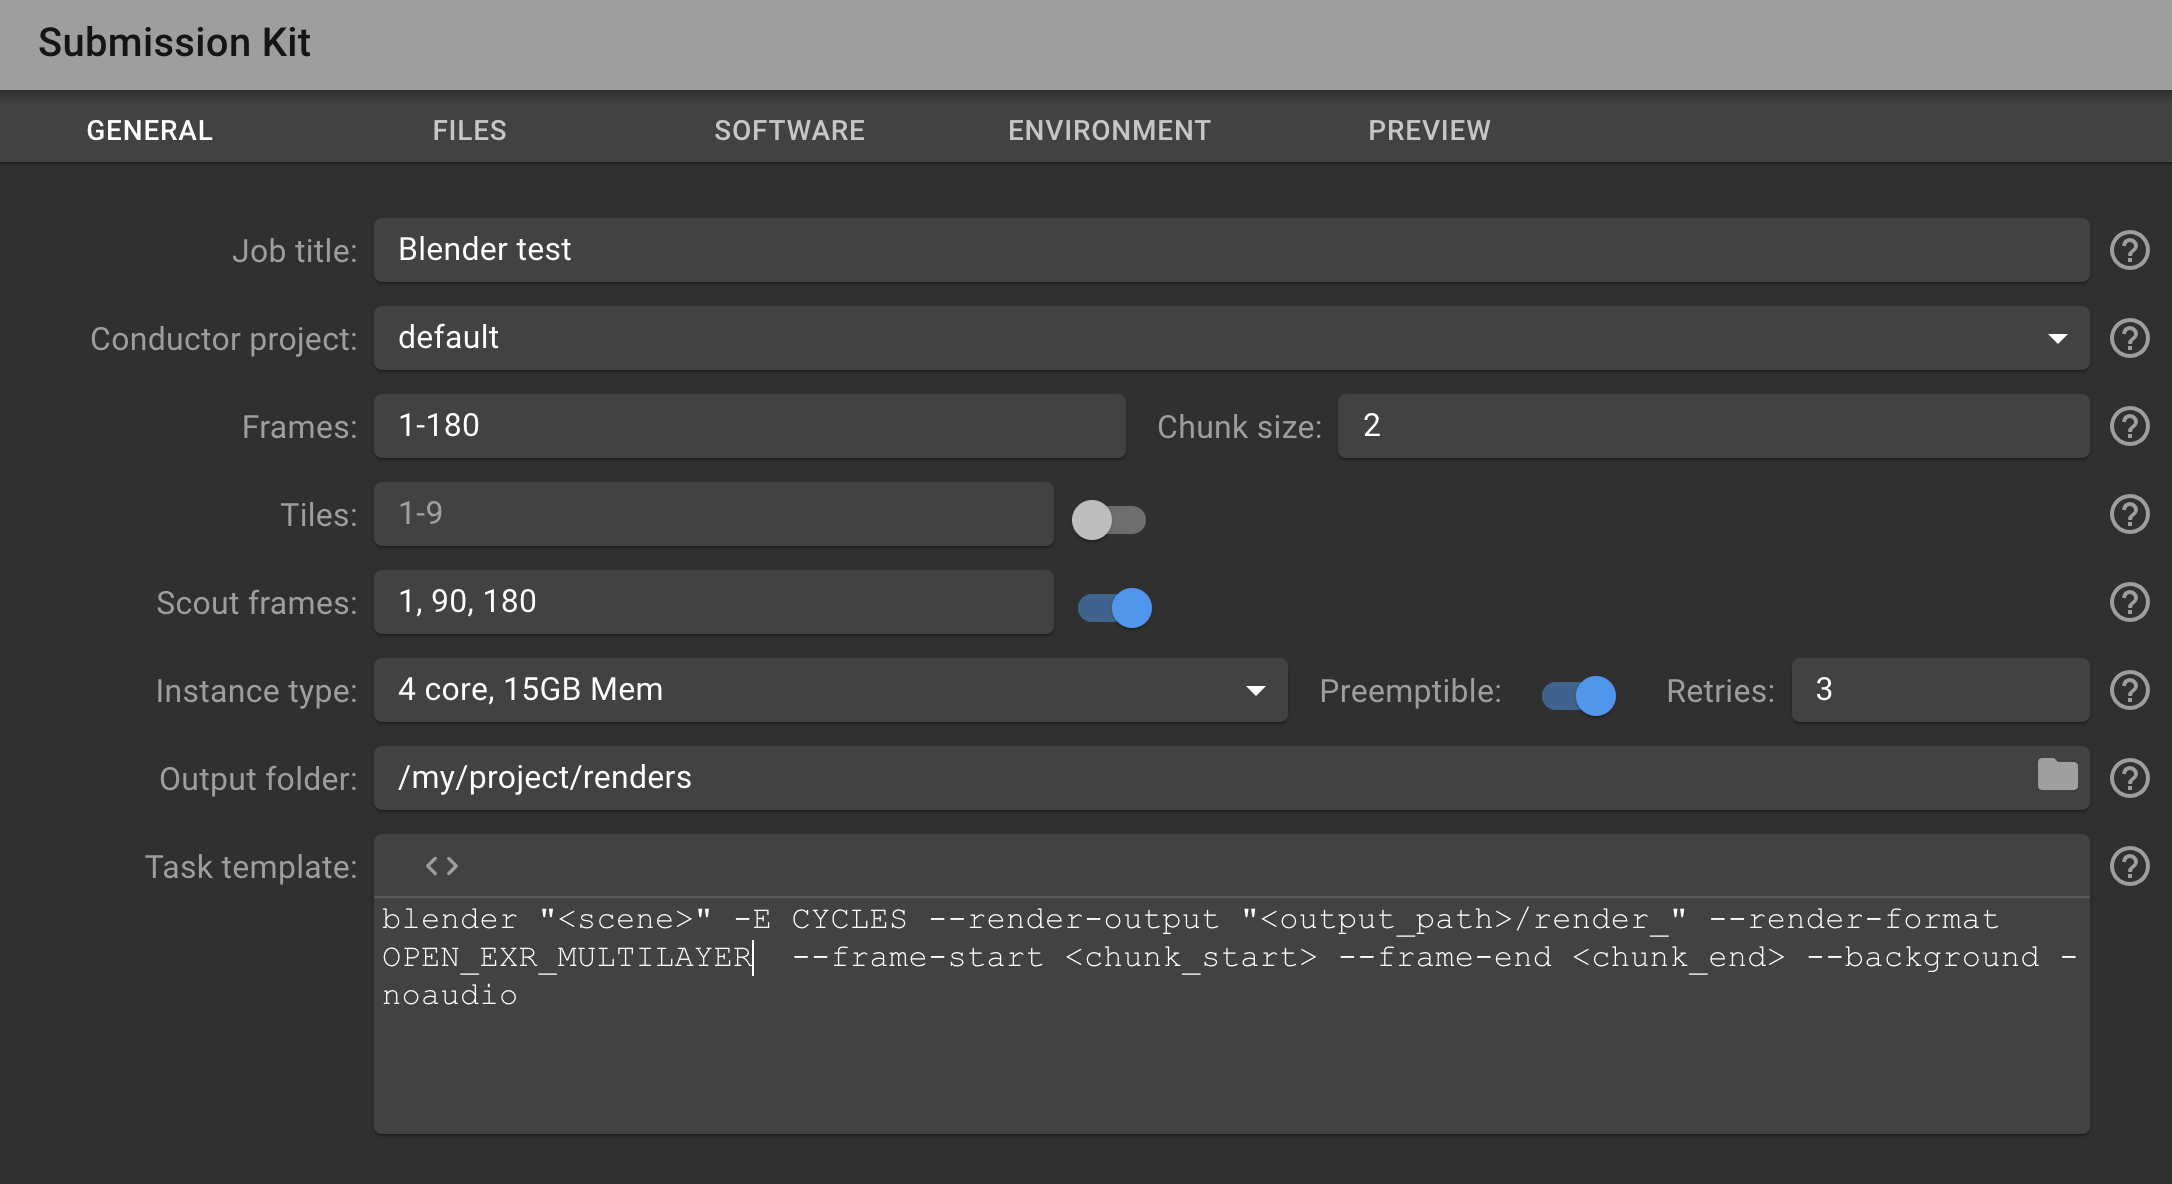
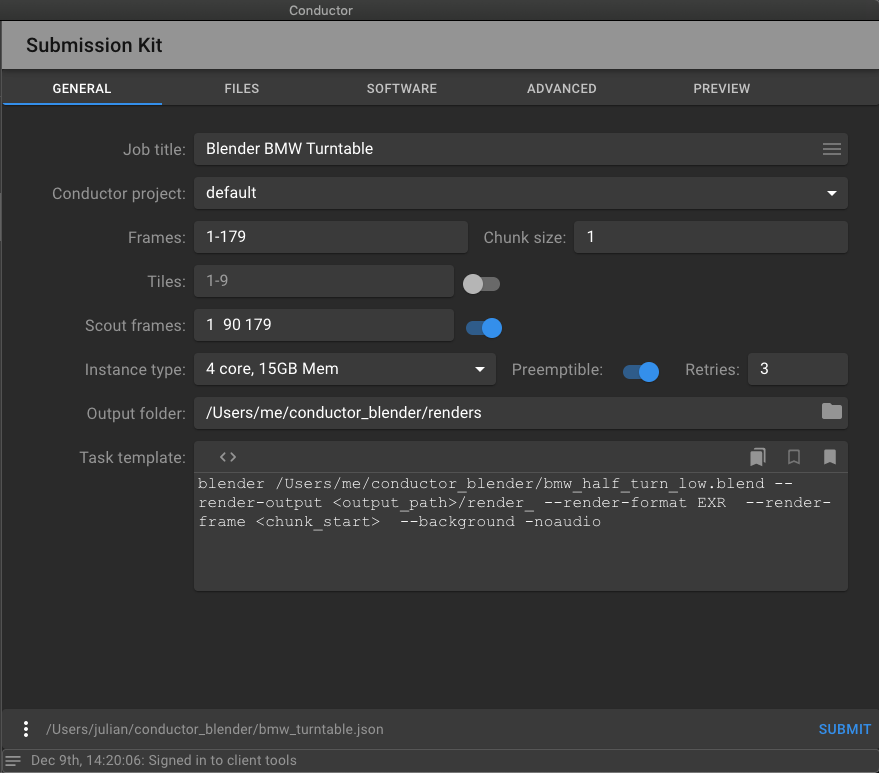
- Fill in the fields in the General tab as illustrated below. You may have to choose a different instance type and a project that exists in your account.

You can browse for an output directory where your renders are ultimately downloaded to. This directory must not contain any of your input files.
Note
Due to a limitation in the file dialog, the button to choose a directory is labeled "Upload".
Task Template
The Task Template is where you specify the CLI command to run on each render node in the cloud.
- Enter the following text in the Task Template field. Be sure to substitute your actual working directory.
blender /Users/me/conductor_blender/bmw_half_turn_low.blend --render-output /Users/me/conductor_blender/renders/render_ --render-format EXR --render-frame <chunk_start> --background -noaudio
This is a regular CLI command to render a single frame of a Blender file.
Notice the --render-output flag points to a file in the output folder. If you like, you can refer to the contents of the output directory with a token:
- Select the text
/Users/me/conductor_blender/rendersthen click the<>icon and choose output_path.
The output path in the template changes to <output_path>/render_ and the resolved render commands in the submission preview will now always point to the chosen output directory.
Take a moment to save the state of the submission.
- Choose Save As from the More menu in the bottom left corner of the panel and save it in your working directory as
bmw_turntable_render.json.

Notice in the task template, the token: <chunk_start> specifies the frame to be rendered. This token is replaced with a different frame number for each of the 180 tasks. If you go to the Preview tab now you'll see a json object that represents the submission fully resolved. The tasks_data section shows how each command is constructed from the template.
File Dependencies
You may have noticed in the Preview tab that the upload_paths section was empty. The Blender submission relies on just one file, bmw_half_turn_low.blend, so you'll need to tell the submitter to upload it.
- Go to the Files tab and click the folder icon to browse for the blender scene file. Check the Preview tab to check that the file is included in the upload_paths field.

Software
You must specify all the host software and plugin services you need for them to be made available to the render nodes and to have their environments correctly set.
- Go to the Software tab and choose a recent version of Blender.

If you head back to the Preview tab now, you'll see the environment section contains Blender's paths.
Python Location
The submission is submitted using Conductor's client side Python API, and therefore you need to ensure you have Python 2.7 available. Check the Advanced tab. If the Python Location field is empty, browse for a valid Python 2.7 installation on your system. If Python 2.7 is not installed, you'll need to install it before you can submit your job.
Submit
You can now press Submit. You should see some activity in the status bar. If you click the small icon in the status bar you'll see the whole log, where you can identify errors if any. If the submission is successful you'll be presented with a link to the job in Conductor's web UI.