Cinema 4D Submitter (beta)
Introduction
The Conductor submitter for Cinema 4D allows you to ship renders to Conductor from a familiar interface within Cinema 4D. It's implemented as a Cinema 4D plugin with a dialog.
Any properties you set on Conductor will be stored inside the project when you save, so you can be confident that subsequent renders of the same scene will behave the same.
Register the Plugin
To register the submitter plugin, perform the following steps:
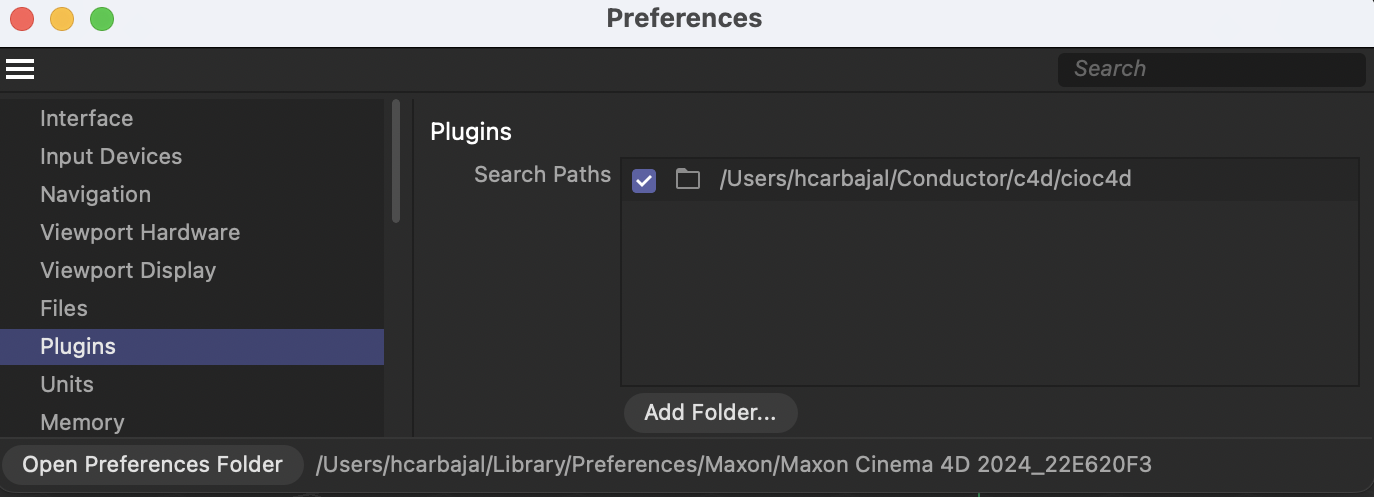
- Open Cinema 4D and go to Edit->Preferences->Plugins.
- In the Search Paths panel click Add Folder, and browse to /Users/
/Conductor/cioc4d. - Restart Cinema 4D and you should see a Conductor menu in the menu bar.

Conductor command-line tools
It is recommended to add the Conductor bin location to your PATH variable (if you haven't already done so). You can do this in ~/.bashrc on Mac and Linux, or use the Environment Variables panel on Windows.
# Add the Conductor bin location to your PATH.
export PATH=$PATH:/Users/<username>/Conductor/bin
Shared installation
To make the plugin accessible to others on your network, you can set Cinema 4D's g_additionalModulePath variable in .bashrc or the equivalent for your shell. See below.
# Add the Conductor plugin location to the Cinema 4D's g_additionalModulePath.
export g_additionalModulePath=/Users/<username>/Conductor/cioc4d
Once the plugin is registered, by restarting Cinema 4D, you should see Conductor in the Extensions menu, as well as a standalone pulldown along the top. If not, submit a ticket to Conductor Support.
Quick Start
To create a submission to Conductor
- Open a scene containing one or more images to be rendered.
- Conductor or Extensions menu, select Conductor Render.

You'll now see the Conductor Submitter window.

- Set a title for your job. This will show up on the Conductor dashboard when you submit.
- Click Add in the Images section to choose some images or layers to be rendered.
You'll notice the project is - not set - and the pulldown menu is empty. This is because the submitter has not yet been in contact with your account at Conductor.
- Press the Connect button at the bottom of the dialog and if prompted, sign in to Conductor.
- Choose a project from the Project drop-down menu.
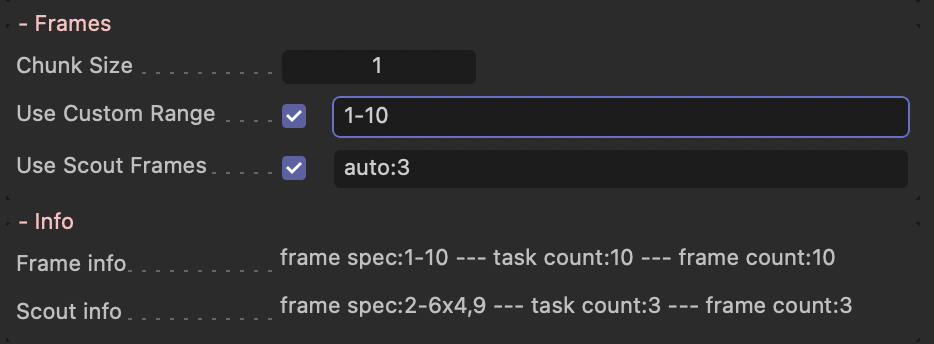
- In the Frames section, turn on Use Custom Frames and enter
1-10in the Custom Frames field. - Set Chunk Size to 2.
- Turn on Use Scout Frames and enter
3,8in Scout Frames field.
You'll notice the Frame Info section has updated to let you know which frames will be submitted, and how many will be scouted first.

- If you know the machine specification needed for your images, choose it in the Instance Type drop-down menu.
- Check that a suitable version of Cinema 4D appears in the Cinema 4D Version field.
You are now ready to submit your render using the Submit button at the bottom of the dialog. On submission, a number of validations will take place to catch any issues. You can also check the Preview section for potential issues in the submission payload beforehand.

If everything looks good, press the Submit button, and then head over to the Conductor dashboard to monitor your job.